38 — 地球 shader
简介
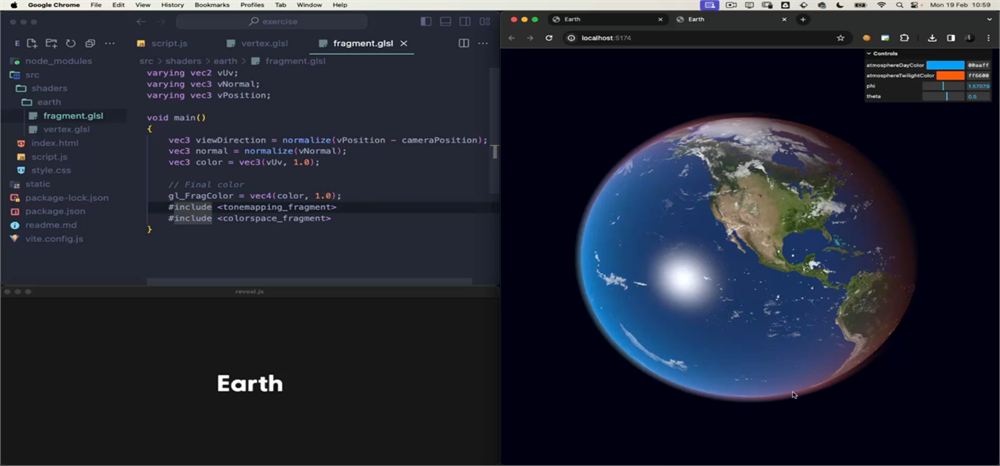
创建一个逼真的地球听起来可能很简单。创建一个球体,把一张好看的地球 texture 贴上去,就大功告成了,对吧?
可惜的是,实际情况要复杂得多:
- 暗面的城市会被照亮
- 有云层
- 太阳的反射主要出现在海洋上,而不是大陆上
- 白天与夜晚之间的部分,也就是晨昏线,看起来偏红
- 大气层在地球周围形成一圈光晕,让人感觉像是一个体积
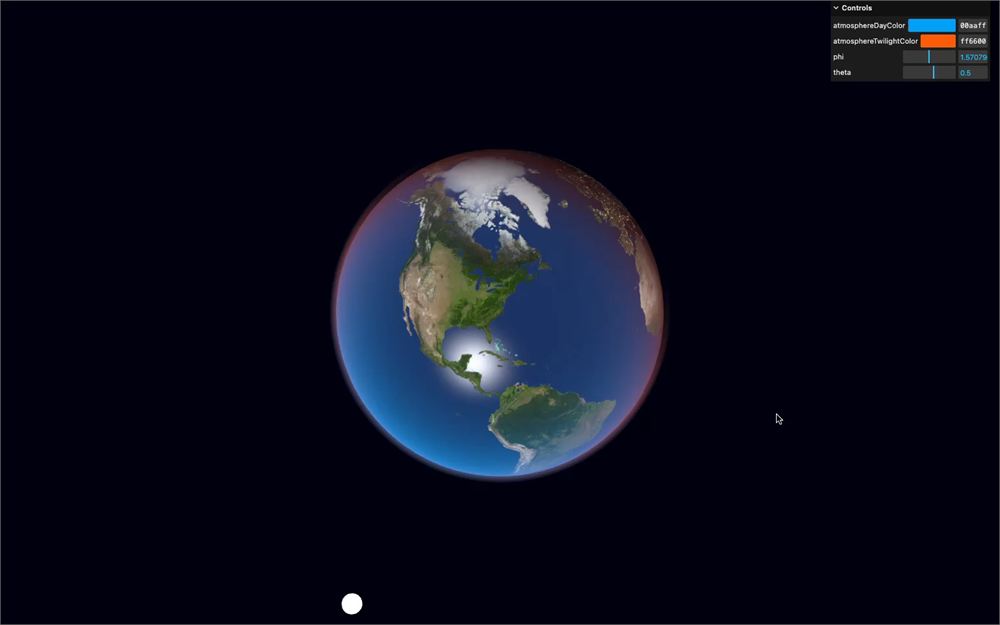
我们不打算使用带复杂科学公式的基于物理的渲染,但这并不妨碍最终结果看起来既美观又逼真。
设置
起始项目已经包含以下内容:
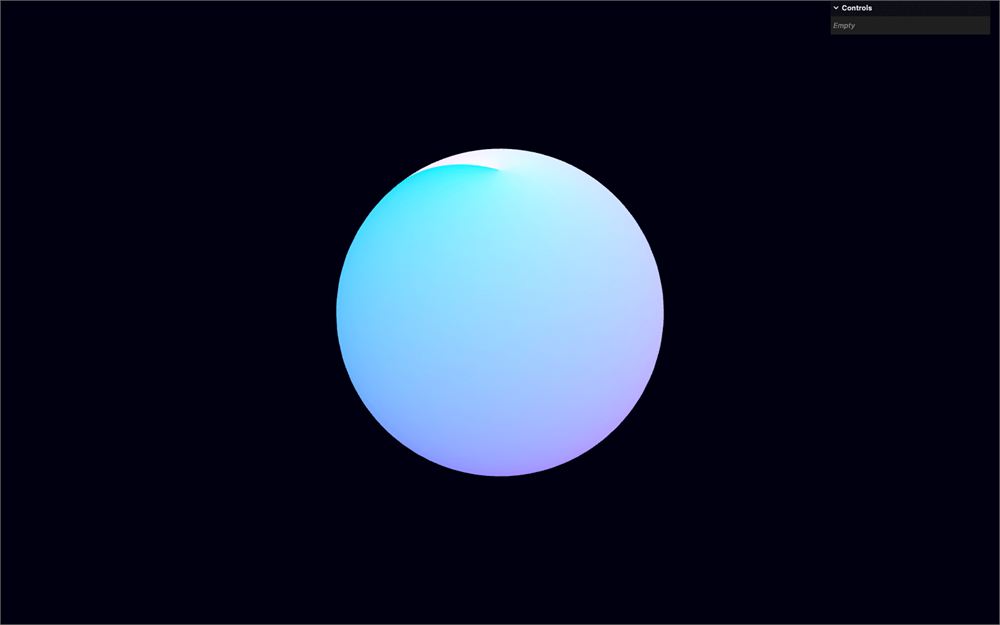
- 一个细分良好的球体,缓慢旋转
- 在
src/shaders/earth/文件夹中已经包含了一个基础 shader,其中有一个vertex.glsl和一个fragment.glsl - 一个
lil-gui实例,暂时还没有任何 tweak - 用于处理 GLSL 文件的
vite-plugin-glsl依赖 - 用于环绕旋转的
OrbitControls - 一个
TextureLoader实例
至于 shader 本身:
uv以vUv的形式发送到 fragment,并显示在gl_FragColor上modelPosition以vPosition的形式发送到 fragment,并用于计算viewDirection变量(从 camera 指向 fragment 位置的向量)- 变换后的
normal以vNormal的形式发送到 fragment,并再次归一化为normal,以防止网格瑕疵
对于一个起始项目来说内容相当多,但这些概念我们在之前的课程中已经学习并练习过几次了。
地球 texture
在本课中,我们将使用地球 texture。不过,这些代码也可以轻松应用到其他行星,甚至是奇特的或程序化生成的行星上。
我们将使用你可以在 Solar System Scope 上找到的 texture。这是一个在 CC Attribution 4.0 许可下提供各种行星 texture 的网站,该许可要求提供适当的署名。如果你将网站上线,请确保在页面某处显示这些署名。
地球 texture 已经可以在 static/earth/ 文件夹中找到。
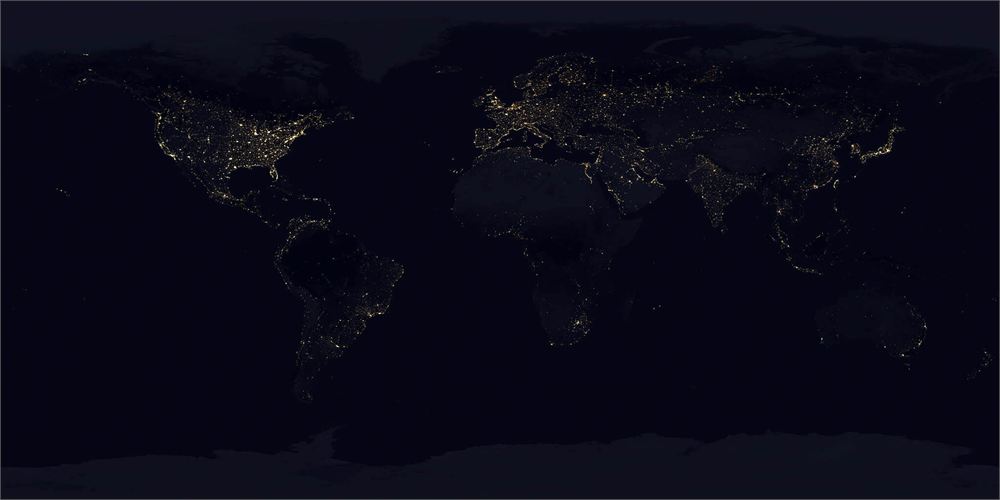
day.jpg 和 night.jpg 文件是两个独立的 texture。我们将把两者都发送到 shader,并根据太阳的方向在它们之间进行混合。它们已经以 sRGB 编码。
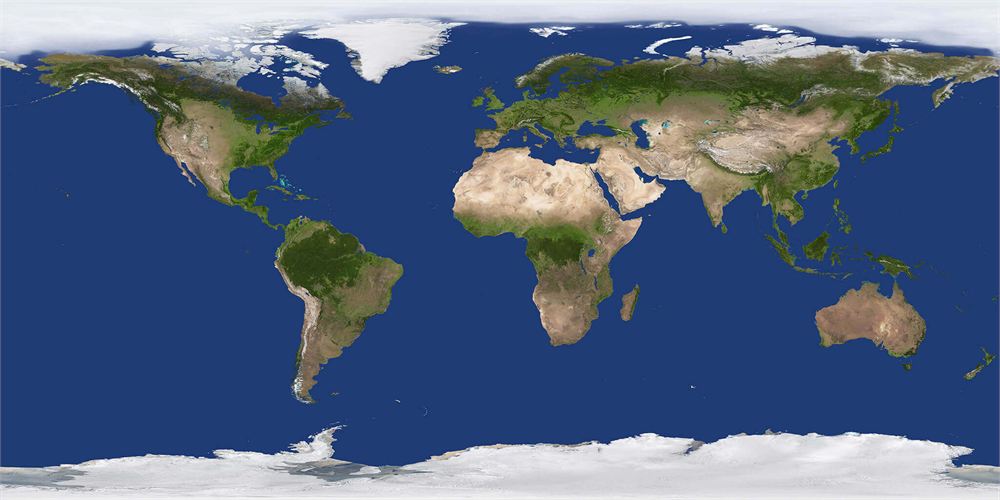
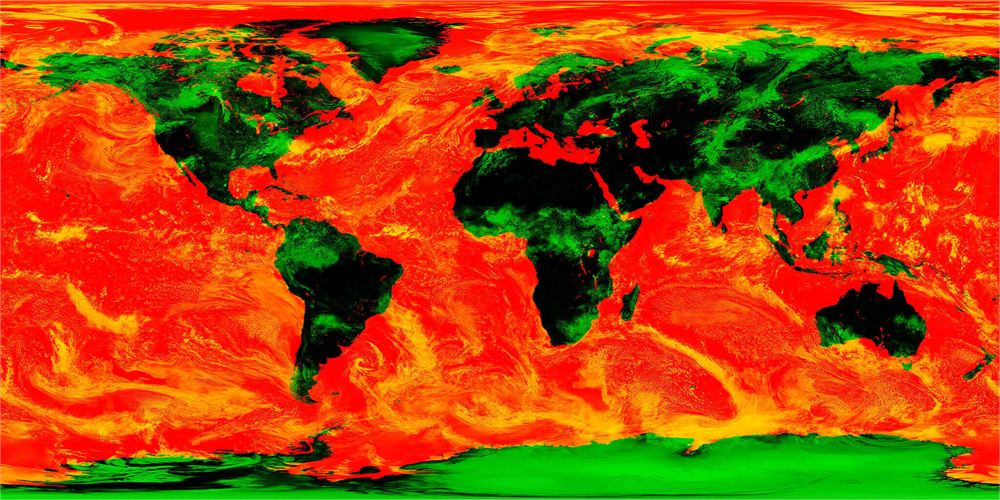
specularClouds.jpg 将高光 texture(具有反射的区域)放在红色通道中,将云层 texture 放在绿色通道中。像这样组合数据可以减少我们分配给 GPU 的内存量。该 texture 以 linear 编码。
所有 texture 都已调整为 4096x2048 分辨率,并针对网页进行了压缩。
加载
让我们加载全部三个 texture。
在 Earth 部分的开始处,使用 textureLoader 的 load() 加载以下 texture:
./earth/day.jpg./earth/night.jpg./earth/specularClouds.jpg
/**
 * Earth
 */
// Textures
const earthDayTexture = textureLoader.load('./earth/day.jpg')
const earthNightTexture = textureLoader.load('./earth/night.jpg')
const earthSpecularCloudsTexture = textureLoader.load('./earth/specularClouds.jpg')
day.jpg 和 night.jpg 已经以 sRGB 编码,因为它们将用于显示,我们需要把这个信息告知 Three.js。
将它们的 colorSpace 更新为 THREE.SRGBColorSpace:
// Textures
const earthDayTexture = textureLoader.load('./earth/day.jpg')
earthDayTexture.colorSpace = THREE.SRGBColorSpace

const earthNightTexture = textureLoader.load('./earth/night.jpg')
earthNightTexture.colorSpace = THREE.SRGBColorSpace

const earthSpecularCloudsTexture = textureLoader.load('./earth/specularClouds.jpg')
使用 Uniform 类将这三个 texture 作为以下 uniform 发送到 earthMaterial:
uDayTextureuNightTextureuSpecularCloudsTexture
const earthMaterial = new THREE.ShaderMaterial({
    // ...
    uniforms:
    {
        uDayTexture: new THREE.Uniform(earthDayTexture),
        uNightTexture: new THREE.Uniform(earthNightTexture),
        uSpecularCloudsTexture: new THREE.Uniform(earthSpecularCloudsTexture)
    }
})
在 fragment.glsl 中,将这三个 uniform 都作为 sampler2D 取出:
uniform sampler2D uDayTexture;
uniform sampler2D uNightTexture;
uniform sampler2D uSpecularCloudsTexture;
白天 / 夜晚颜色
我们希望在地球面向太阳的一侧显示 uDayTexture,在另一侧显示 uNightTexture。
首先,把 color 设为 vec3(0.0):
void main()
{
    // ...
    vec3 color = vec3(0.0);

    // ...
}
使用 texture() 方法和 vUv 从 uDayTexture 中取出 color,然后对 uNightTexture 做同样的操作。我们只需要 rgb 通道,可以把它们保存在 vec3 变量中:
void main()
{
    // ...

    // Day / night color
    vec3 dayColor = texture(uDayTexture, vUv).rgb;
    vec3 nightColor = texture(uNightTexture, vUv).rgb;

    // Final color
    // ...
}
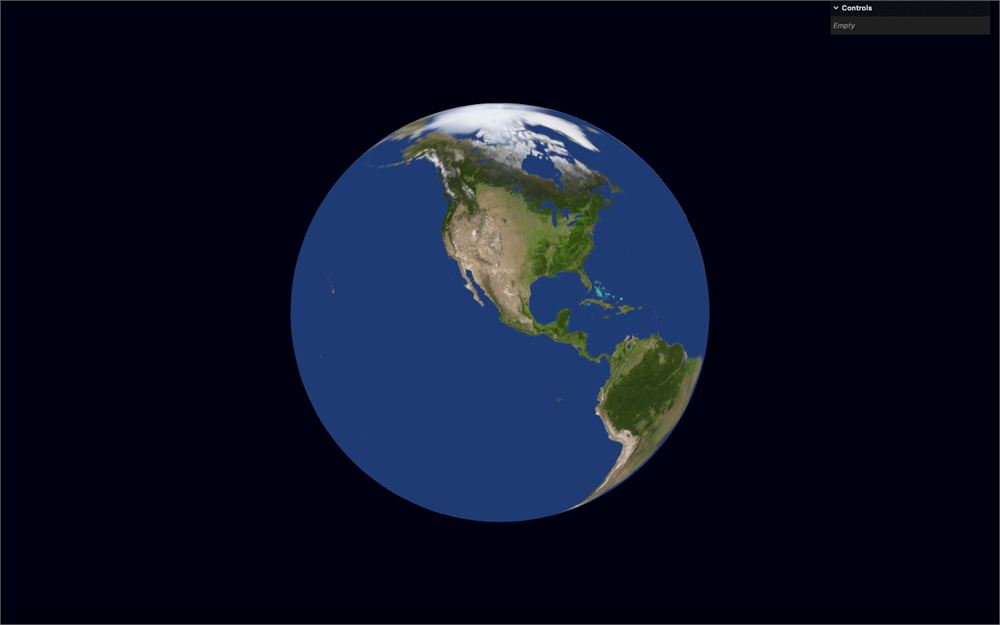
让我们尝试把 dayColor 放到 color 上:
void main()
{
    // ...

    // Day / night color
    vec3 dayColor = texture(uDayTexture, vUv).rgb;
    vec3 nightColor = texture(uNightTexture, vUv).rgb;
    color = dayColor;

    // ...
}
再把 nightColor 放到 color 上:
void main()
{
    // ...

    // Day / night color
    vec3 dayColor = texture(uDayTexture, vUv).rgb;
    vec3 nightColor = texture(uNightTexture, vUv).rgb;
    color = nightColor;

    // ...
}
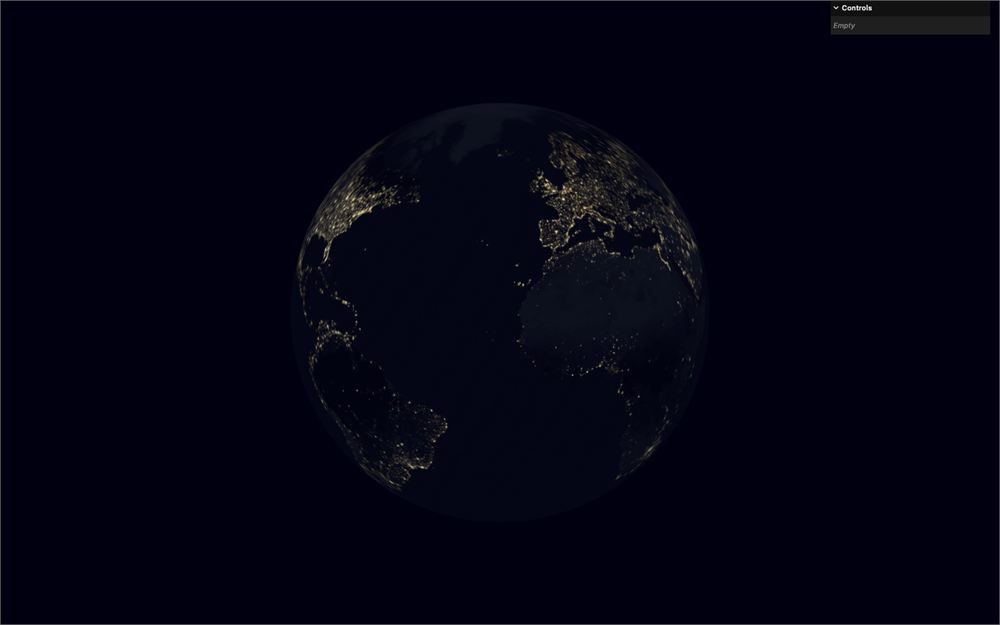
两者都能正常工作。
是时候把它们混合起来了,而 mix 正是我们将要使用的函数。不过,mix 需要一个混合因子,用来控制取其中一个或另一个的比例。
我们希望这个混合因子在面向太阳的一侧为 1.0,在另一侧为 0.0:
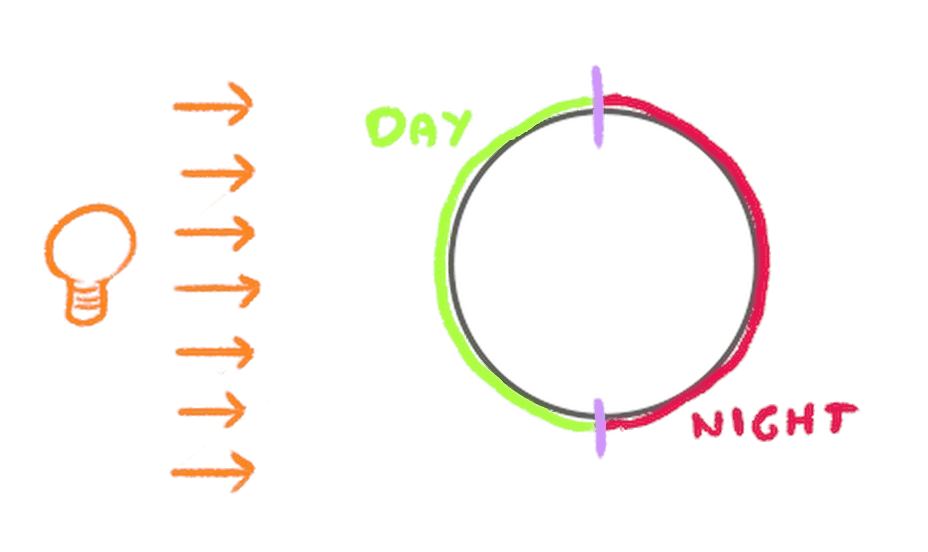
我们将使用常见的点积。它和我们做 directional light 着色时非常相似,首先,我们需要一个光的方向。
目前,我们将在 GLSL 中创建这个太阳方向,稍后我们将使用 uniform 来控制它。
在 Day / night color 部分之前,创建一个 vec3 uSunDirection,并将其设为 vec3(0.0, 0.0, 1.0):
void main()
{
    // ...

    // Sun orientation
    vec3 uSunDirection = vec3(0.0, 0.0, 1.0);

    // Day / night color
    // ...
}
我们将把 uSunDirection 与 normal 的 dot 保存到一个 float sunOrientation 变量中:
void main()
{
    // ...

    // Sun orientation
    vec3 uSunDirection = vec3(0.0, 0.0, 1.0);
    float sunOrientation = dot(uSunDirection, normal);

    // Day / night color
    // ...
}
出于好奇,你可以把它发送到 color,并注释掉 Day / night 部分:
void main()
{
    // ...

    // Sun orientation
    vec3 uSunDirection = vec3(0.0, 0.0, 1.0);
    float sunOrientation = dot(uSunDirection, normal);
    color = vec3(sunOrientation);

    // // Day / night color
    // vec3 dayColor = texture(uDayTexture, vUv).rgb;
    // vec3 nightColor = texture(uNightTexture, vUv).rgb;
    // color = nightColor;

    // ...
}
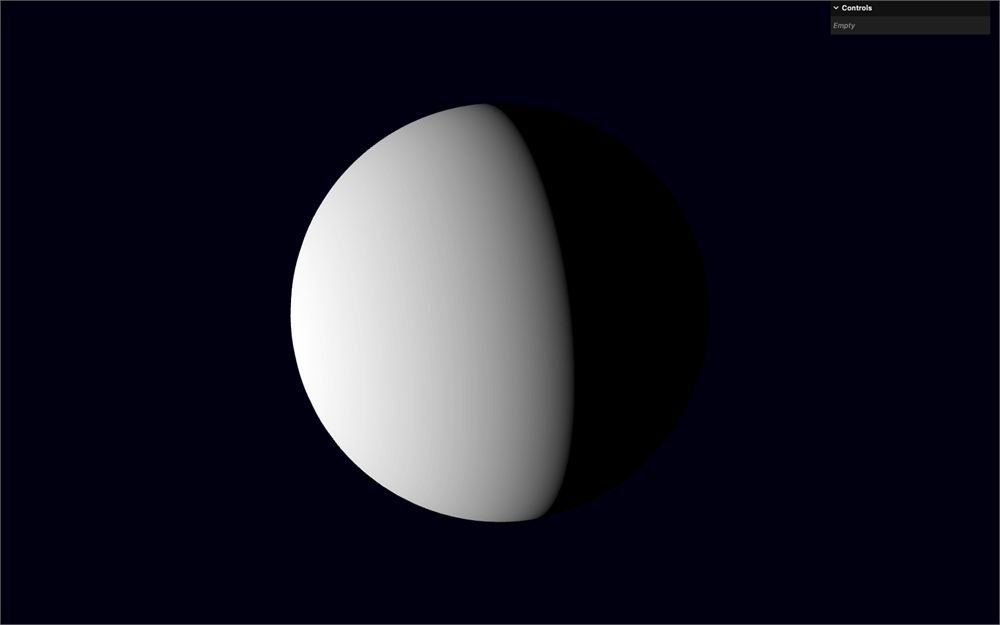
明亮的部分将是白天 texture,暗的部分将是夜晚 texture。
移除 color 测试:
void main()
{
    // ...

    // Sun orientation
    vec3 uSunDirection = vec3(0.0, 0.0, 1.0);
    float sunOrientation = dot(uSunDirection, normal);

    // Day / night color
    vec3 dayColor = texture(uDayTexture, vUv).rgb;
    vec3 nightColor = texture(uNightTexture, vUv).rgb;
    color = nightColor;

    // ...
}
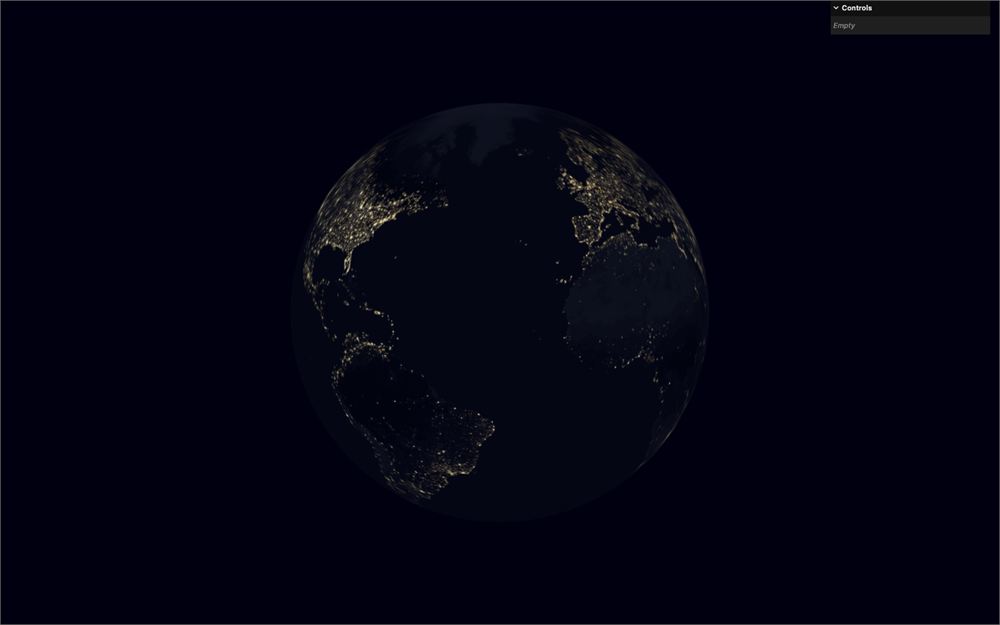
现在我们将创建一个等于 sunOrientation 的 dayMix 变量,然后用它在 dayColor 和 nightColor 之间进行 mix:
void main()
{
    // ...
    float dayMix = sunOrientation;
    vec3 dayColor = texture(uDayTexture, vUv).rgb;
    vec3 nightColor = texture(uNightTexture, vUv).rgb;
    color = mix(nightColor, dayColor, dayMix);

    // ...
}
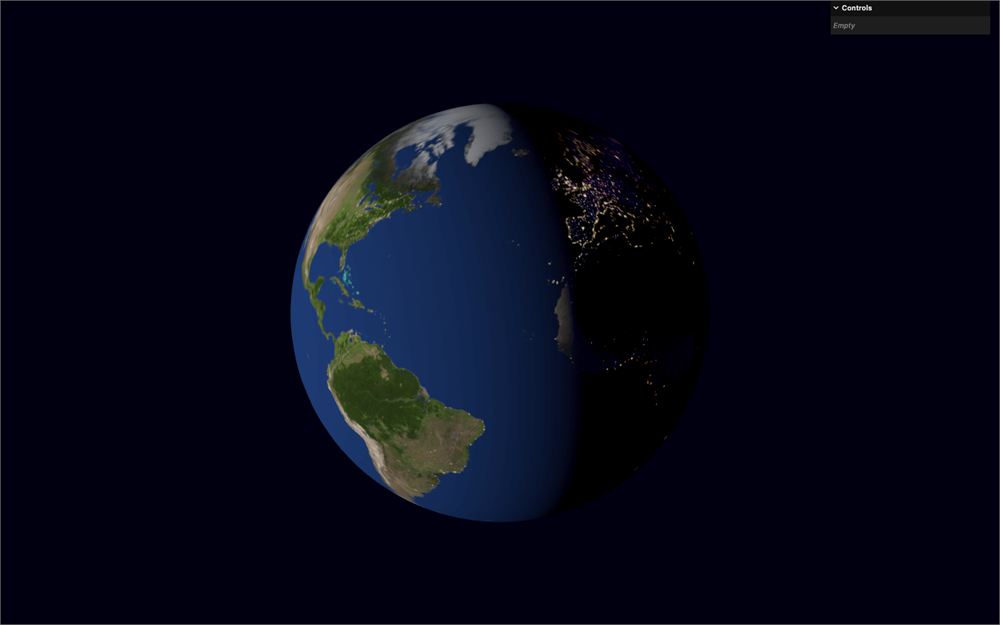
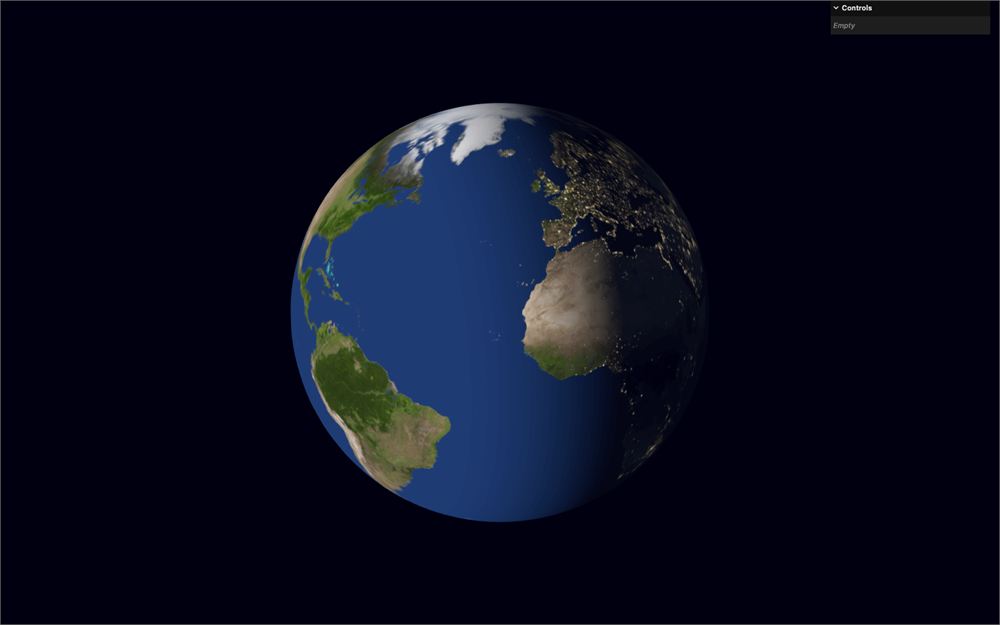
这已经相当不错了,但让我们使用 smoothstep 函数来重映射、钳制和平滑两个 texture 之间的过渡:
void main()
{
    // ...

    // Day / night color
    float dayMix = smoothstep(- 0.25, 0.5, sunOrientation);
    vec3 dayColor = texture(uDayTexture, vUv).rgb;
    vec3 nightColor = texture(uNightTexture, vUv).rgb;
    color = mix(nightColor, dayColor, dayMix);

    // ...
}
太阳
目前,太阳在 GLSL 中仅作为一个方向来处理。
我们将在 JavaScript 中处理它,将其作为 uniform 发送,并在它的位置显示一个 mesh 来帮助我们可视化。
在 script.js 中,在 Earth 部分之后,添加一个 Sun 部分:
/**
 * Sun
 */
就像之前某一课那样,我们将使用 Spherical 类来处理坐标,并将它们转换为 Vector3。
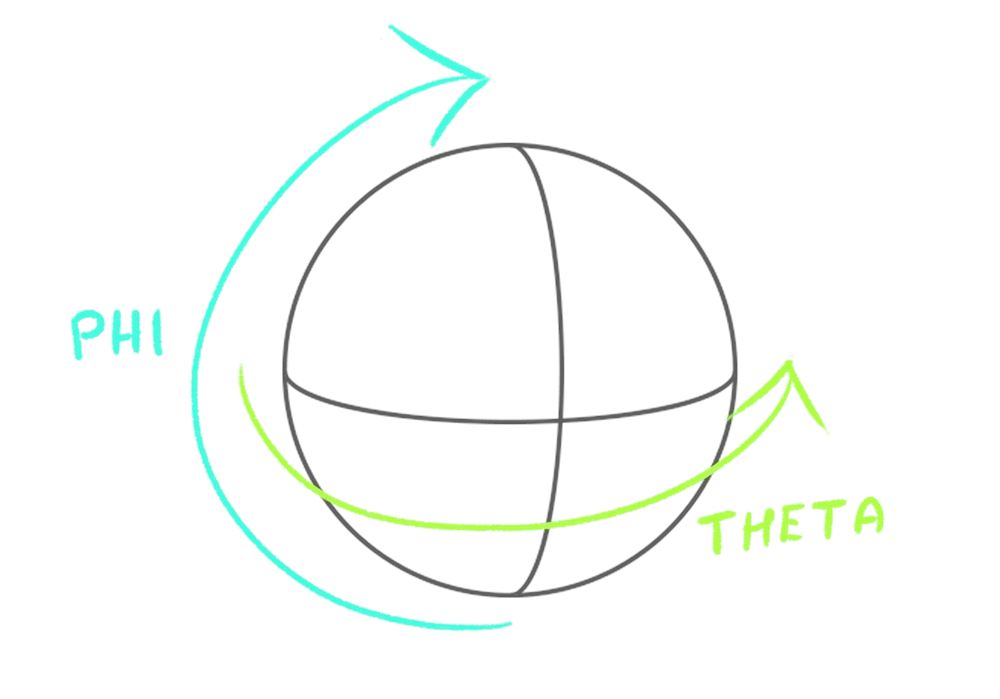
创建一个 sunSpherical 变量,包含以下 Spherical 坐标,以及一个包含默认 Vector3 的 sunDirection:
// Coordinates
const sunSpherical = new THREE.Spherical(1, Math.PI * 0.5, 0.5)
const sunDirection = new THREE.Vector3()
我们将在一个函数中更新 sunDirection,这个函数稍后会派上用场。
创建一个 updateSun 函数,并立即调用它:
// Update
const updateSun = () =>
{
}

updateSun()
在 updateSun 函数中,使用 setFromSpherical() 方法根据 sunSpherical 更新 sunDirection:
const updateSun = () =>
{
    // Sun direction
    sunDirection.setFromSpherical(sunSpherical)
}
由于 sunSpherical 的半径被设为 1,sunDirection 的长度应为 1,也就是说它已经被归一化了。
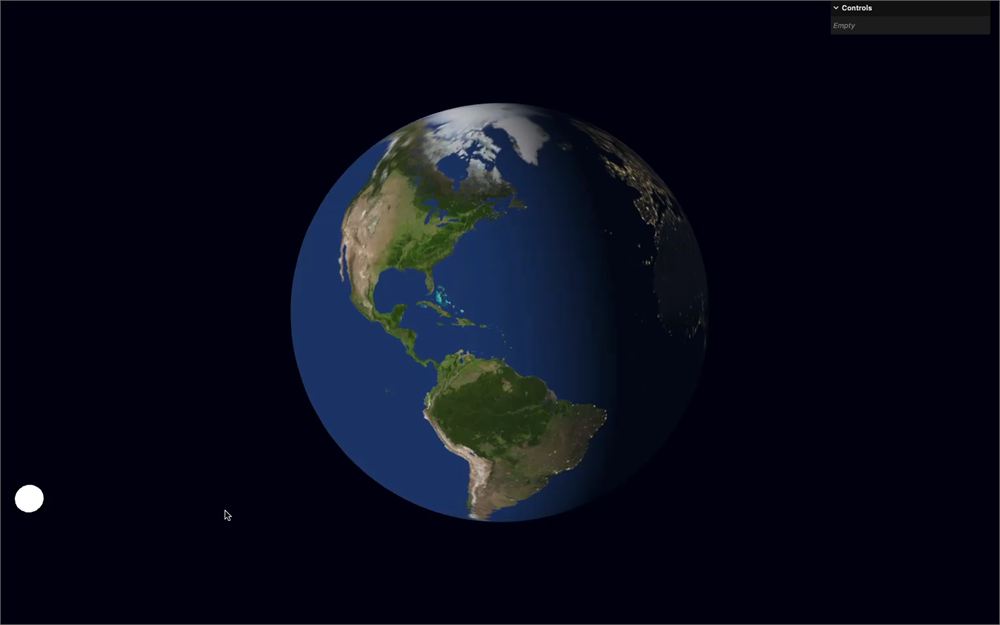
但为了正确地可视化它,我们将创建一个 debug mesh。
在 updateSun 函数之前,使用 IcosahedronGeometry 和 MeshBasicMaterial 创建一个 debugSun mesh,然后把它添加到 scene:
// Debug
const debugSun = new THREE.Mesh(
    new THREE.IcosahedronGeometry(0.1, 2),
    new THREE.MeshBasicMaterial()
)
scene.add(debugSun)
在 updateSun 函数中,使用 copy() 方法把 sunDirection 的值复制到 debugSun.position:
const updateSun = () =>
{
    // Sun direction
    sunDirection.setFromSpherical(sunSpherical)

    // Debug
    debugSun.position.copy(sunDirection)
}
不幸的是,由于半径为 1,而地球的半径为 2,这个 mesh 仍然在地球内部。
为了把它移开,我们可以在 copy() 之后立即对 debugSun.position 使用 multiplyScalar() 方法:
const updateSun = () =>
{
    // Sun direction
    sunDirection.setFromSpherical(sunSpherical)

    // Debug
    debugSun.position.copy(sunDirection).multiplyScalar(5)
}
像这样链式调用方法时,我喜欢添加换行,以清楚地表明调用了多个方法:
const updateSun = () =>
{
    // Sun direction
    sunDirection.setFromSpherical(sunSpherical)

    // Debug
    debugSun.position
        .copy(sunDirection)
        .multiplyScalar(5)
}
现在我们可以为 sunSpherical 的 phi 和 theta 角度添加 tweak,并在 tweak 变化时调用 updateSun:
// Tweaks
gui
    .add(sunSpherical, 'phi')
    .min(0)
    .max(Math.PI)
    .onChange(updateSun)

gui
    .add(sunSpherical, 'theta')
    .min(- Math.PI)
    .max(Math.PI)
    .onChange(updateSun)
我们的太阳坐标已经就绪。现在需要把它们发送到 shader。
在 earthMaterial 上创建一个 uSunDirection uniform,并使用 Uniform 类将其设为一个 Vector3:
const earthMaterial = new THREE.ShaderMaterial({
    // ...
    uniforms:
    {
        // ...
        uSunDirection: new THREE.Uniform(new THREE.Vector3(0, 0, 1))
    }
})
在 updateSun 函数中更新 uSunDirection:
const updateSun = () =>
{
    // ...

    // Uniforms
    earthMaterial.uniforms.uSunDirection.value.copy(sunDirection)
}
在 fragment.glsl 中,将该 uniform 作为 vec3 取出,并删除我们在 main() 中创建的临时变量:
// ...
uniform vec3 uSunDirection;

// ...

void main()
{
    // Sun orientation
    float sunOrientation = dot(uSunDirection, normal);

    // ...
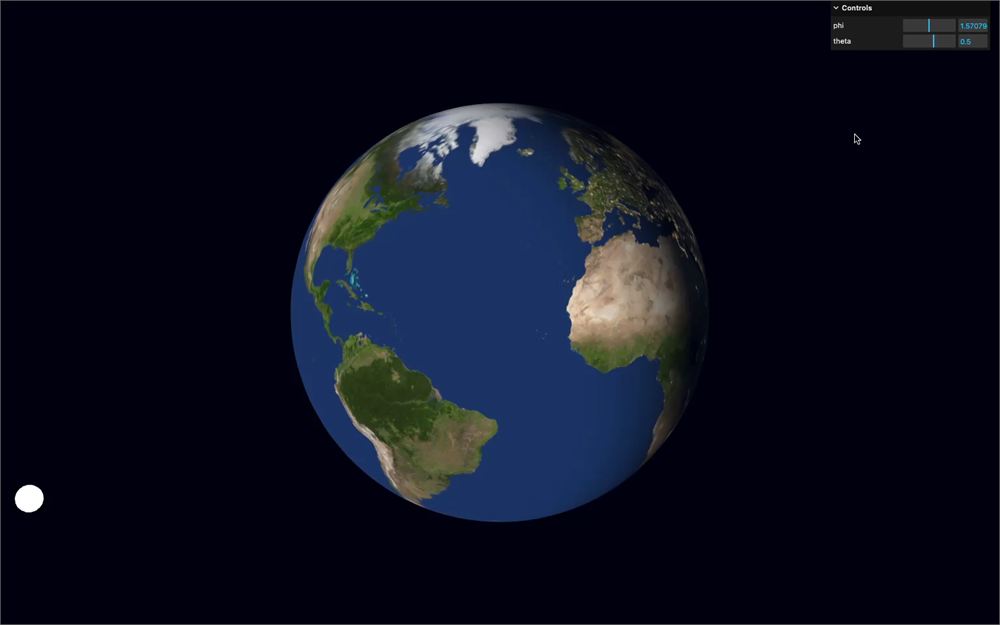
}
各向异性
如果你以较窄的角度观察 texture,你会注意到它们有些许模糊:
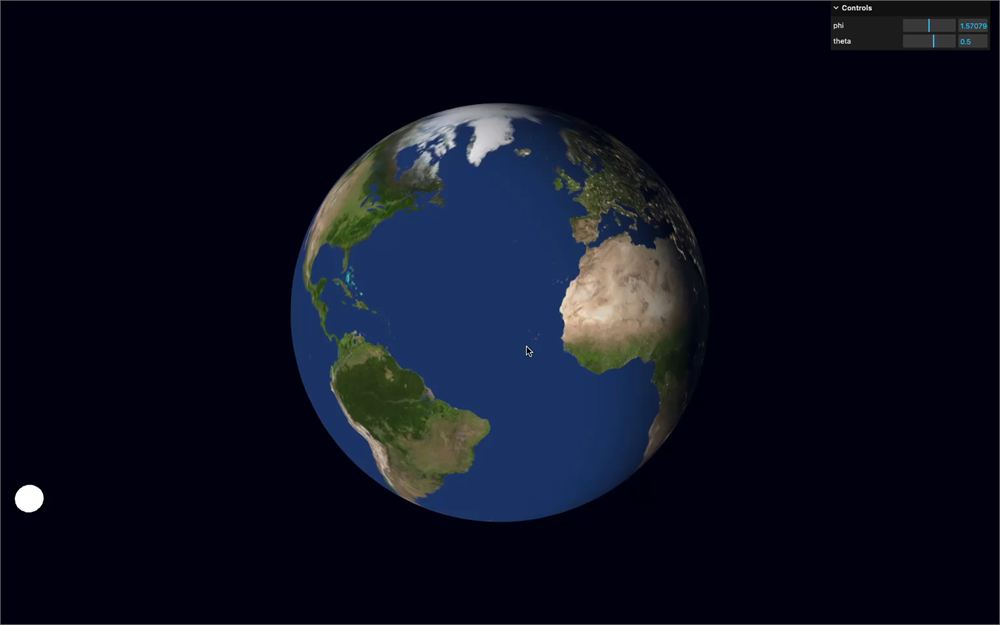
这完全合理,因为这与 texture 分辨率以及放大滤镜有关。我们可以尝试在 texture 上使用另一个 magFilter,但实际还有另一个名为 “anisotropy” 的解决方案。
anisotropy 是 texture 上可用的一个属性,它会通过应用不同级别的过滤,来提高 texture 在较窄角度下观察时的清晰度。
定义听起来很花哨,但思路很简单。anisotropy 越高,texture 就越清晰,默认值为 1。
但要小心,存在硬件限制,你不能对 anisotropy 使用任意值。
确定该限制的一种方法,是在实例化 renderer 后使用以下指令:
renderer.capabilities.getMaxAnisotropy()你可以用 console.log() 打印它:
console.log(renderer.capabilities.getMaxAnisotropy())
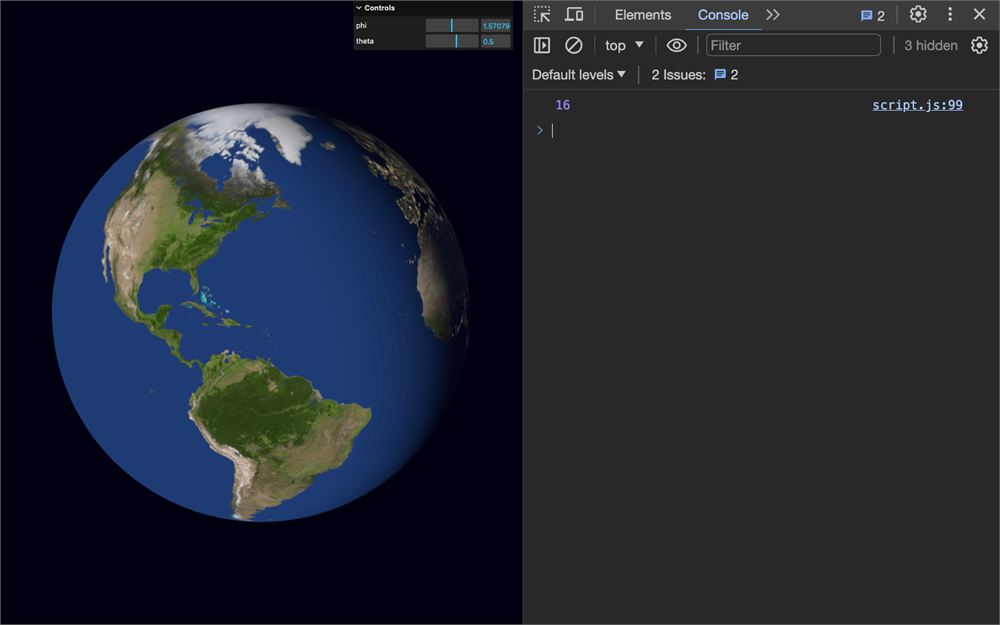
但为了保持简单,我们将使用 8 这个值,它看起来不错,并且应该能在所有设备上正常工作。
在所有三个 texture 上把 anisotropy 设为 8:
const earthDayTexture = textureLoader.load('./earth/day.jpg')
earthDayTexture.colorSpace = THREE.SRGBColorSpace
earthDayTexture.anisotropy = 8

const earthNightTexture = textureLoader.load('./earth/night.jpg')
earthNightTexture.colorSpace = THREE.SRGBColorSpace
earthNightTexture.anisotropy = 8

const earthSpecularCloudsTexture = textureLoader.load('./earth/specularClouds.jpg')
earthSpecularCloudsTexture.anisotropy = 8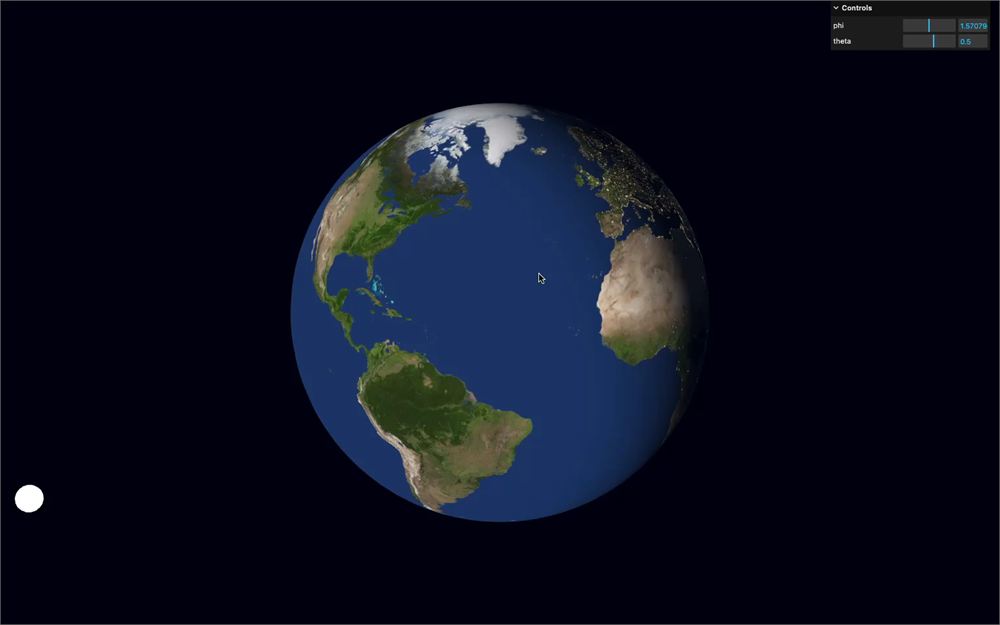
texture 非常清晰,即使在较窄的角度下也是如此。
另外请注意,anisotropy 可能会对性能产生影响。
云层
让我们添加一些云。
我经常看到的一种做法是,在实际地球之上再添加一个球体来承载云,这样可以获得一些灵活性,比如独立旋转云层。
不幸的是,将云作为一个完整 mesh 来旋转看起来不太好,而且我们需要把球体稍微做大一点以防止 z-fighting,而这可能看起来有点奇怪。
相反,我们将直接在 shader 中添加云,并且不制作动画。
我们将使用已经作为 uSpecularCloudsTexture 发送到 shader 的 specularCloudsTexture,并且只使用其中存储云层的绿色通道:
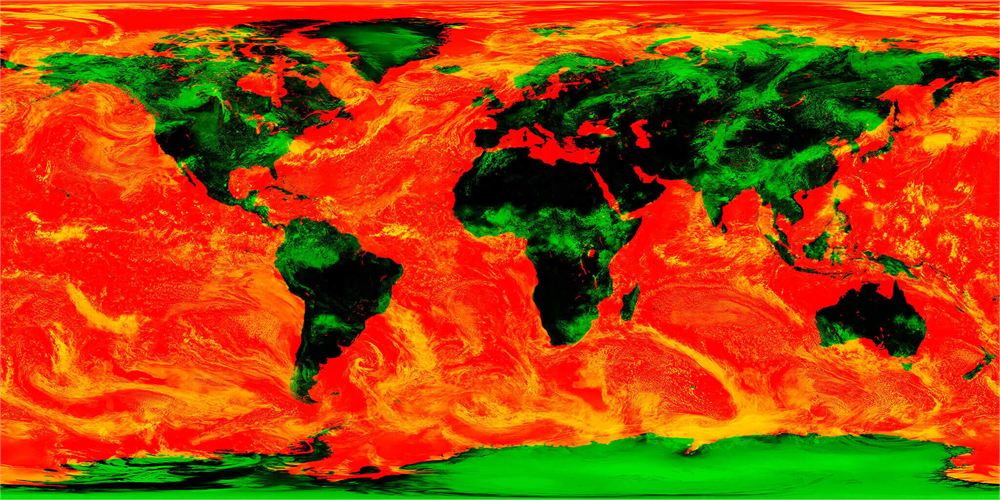
我们同时需要高光和云层的 texture。与其调用两次 texture(),我们只调用一次,仅 swizzle r 和 g 通道,并把它保存到一个 vec2 specularCloudColor 变量中:
void main()
{
    // ...

    // Specular cloud color
    vec2 specularCloudColor = texture(uSpecularCloudsTexture, vUv).rg;
}
出于好奇,你可以把它发送到 color:
void main()
{
    // ...

    // Specular cloud color
    vec2 specularCloudColor = texture(uSpecularCloudsTexture, vUv).rg;
    color = vec3(specularCloudColor, 0.0);

    // Final color
    gl_FragColor = vec4(color, 1.0);
    #include <tonemapping_fragment>
    #include <colorspace_fragment>
}
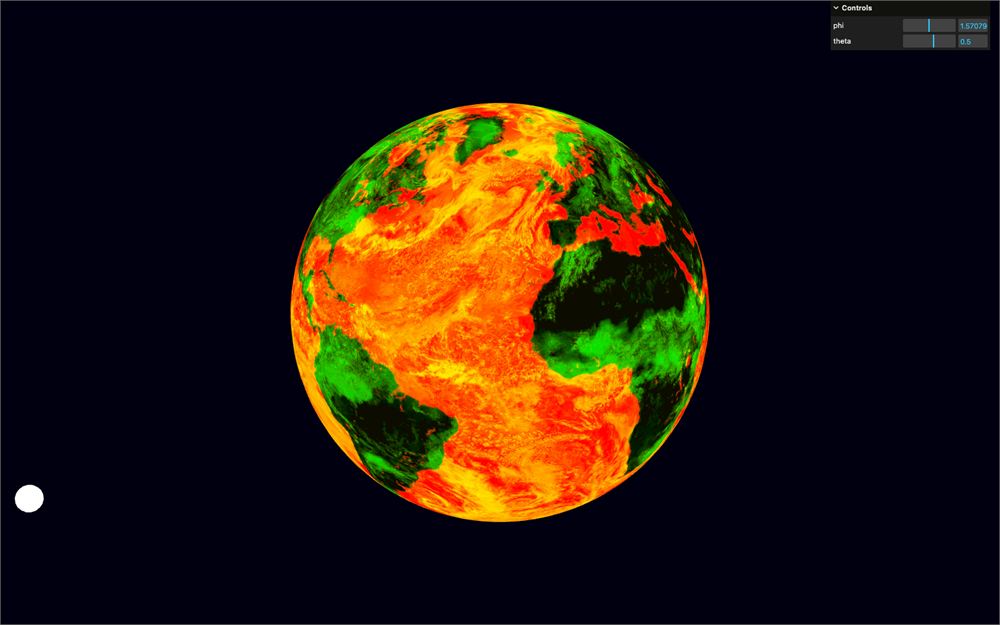
移除 color 测试:
void main()
{
    // ...

    // Specular cloud color
    vec2 specularCloudColor = texture(uSpecularCloudsTexture, vUv).rg;

    // Final color
    gl_FragColor = vec4(color, 1.0);
    #include <tonemapping_fragment>
    #include <colorspace_fragment>
}
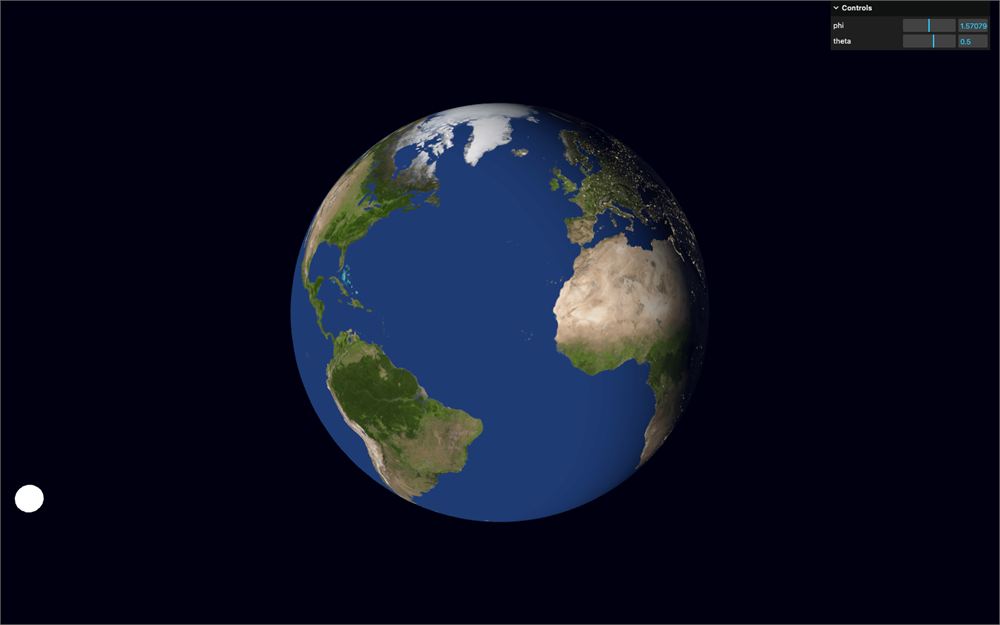
我们将根据 specularCloudColor 的绿色通道,用 vec3(1.0) 与初始 color 混合,来创建白色的云。
创建一个 float cloudsMix 变量,并把 specularCloudColor.g 保存到其中:
void main()
{
    // ...

    // Clouds
    float cloudsMix = specularCloudColor.g;

    // Final color
    // ...
}
根据 cloudsMix,使用 color 和 vec3(1.0)(白色)的 mix 来更新 color:
void main()
{
    // ...

    // Clouds
    float cloudsMix = specularCloudColor.g;
    color = mix(color, vec3(1.0), cloudsMix);

    // ...
}
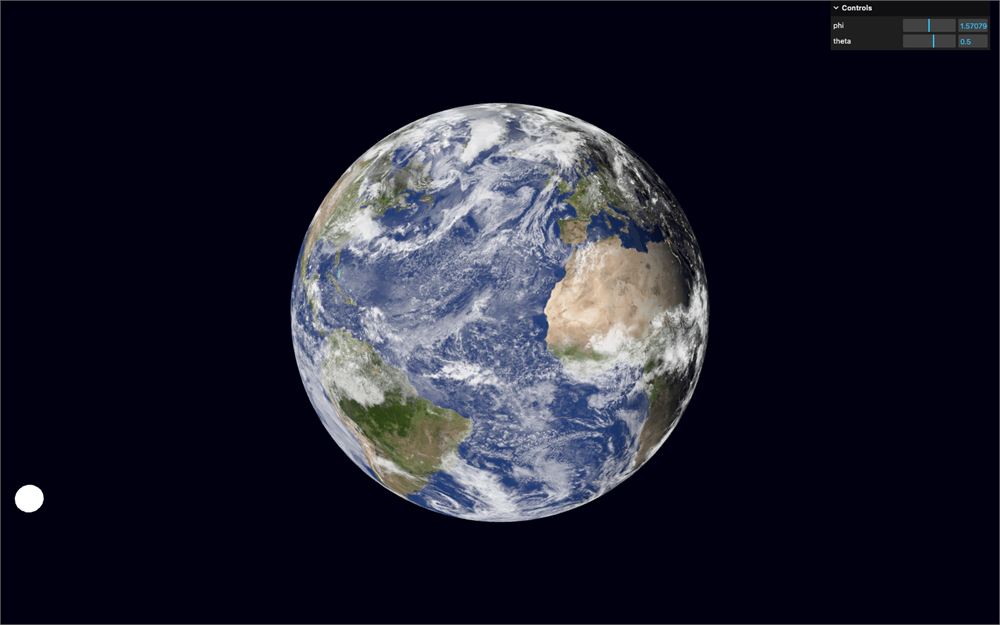
看起来可行,但云太过强烈,覆盖了大部分表面。
我们会对该值进行重映射,这样我们就只会看到原本是云层较密集的部分。
对 specularCloudColor.g 使用 smoothstep,将界限设在 0.5 和 1.0 之间:
void main()
{
    // ...

    // Clouds
    float cloudsMix = smoothstep(0.5, 1.0, specularCloudColor.g);
    color = mix(color, vec3(1.0), cloudsMix);

    // ...
}
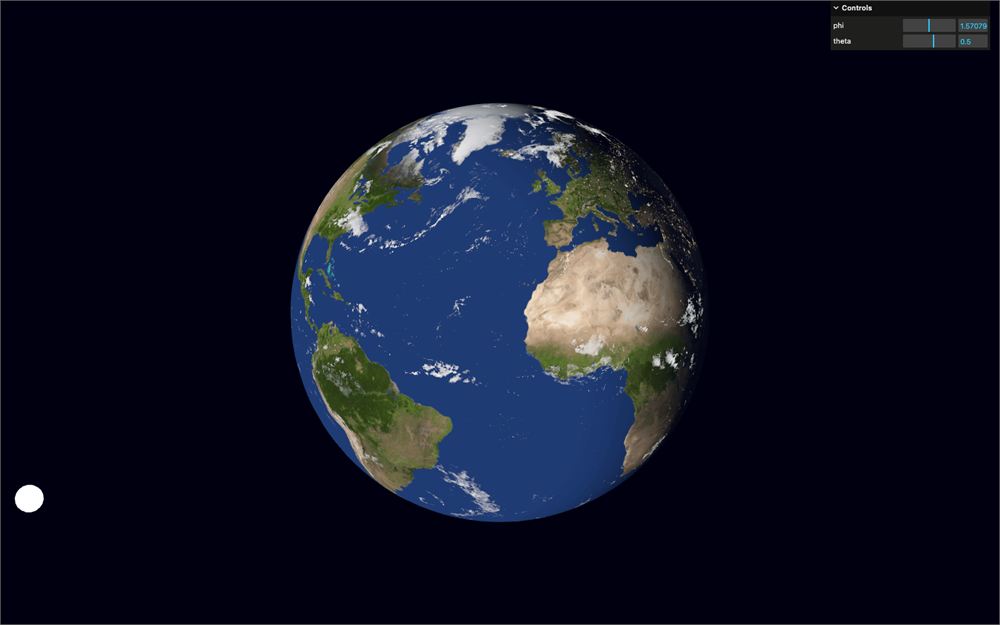
smoothstep 的第一个参数越高,我们得到的云就越少。
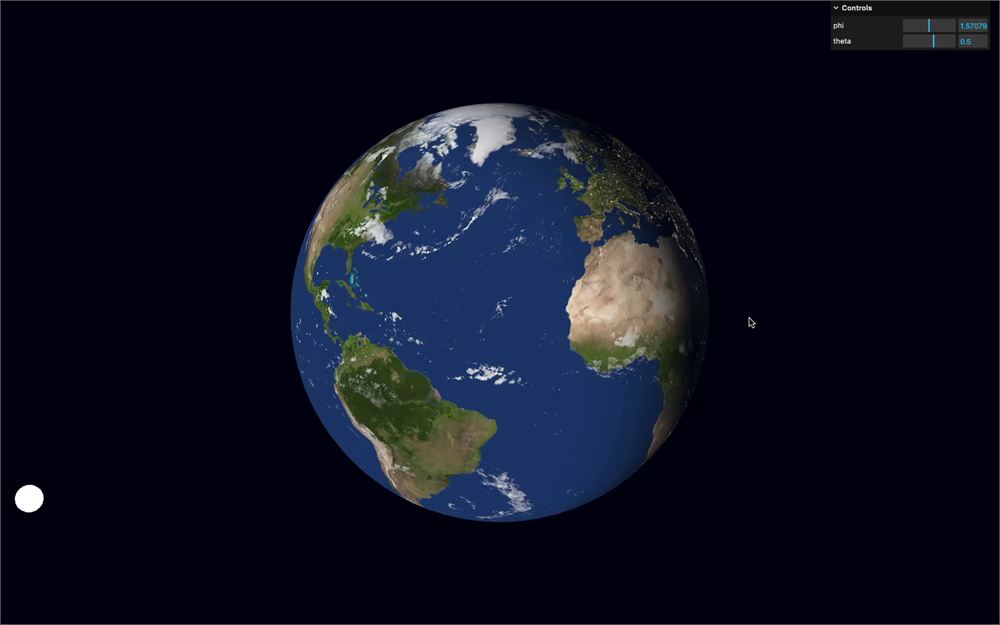
看起来不错,但在地球的夜晚一侧云完全是白色的。我们可以让它们更暗,但那样它们会遮挡城市的灯光,这是我们想要避免的。
相反,我们将让它们在夜晚时消失,这可以通过把 cloudsMix 乘以我们之前用来在白天和夜晚 texture 之间混合的 dayMix 来实现:
void main()
{
    // ...

    // Clouds
    float cloudsMix = smoothstep(0.5, 1.0, specularCloudColor.g);
    cloudsMix *= dayMix;
    color = mix(color, vec3(1.0), cloudsMix);

    // ...
}
大气层
行星一个美丽之处就是大气层,以及光如何穿过它。
这种效果在较窄的角度下更为明显,因为我们会看到更多的大气层:
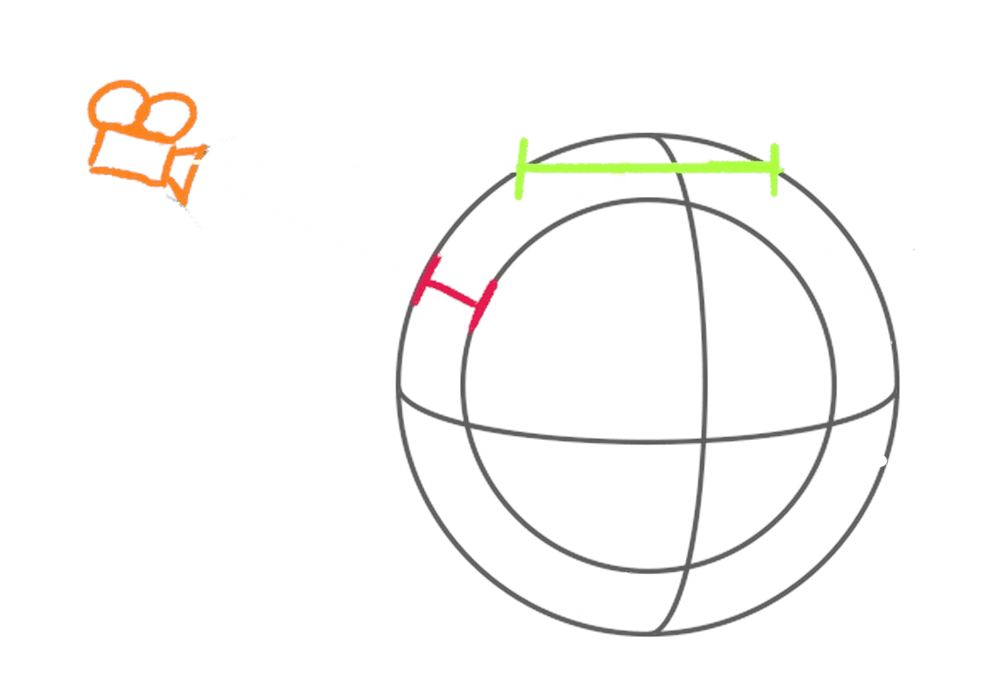
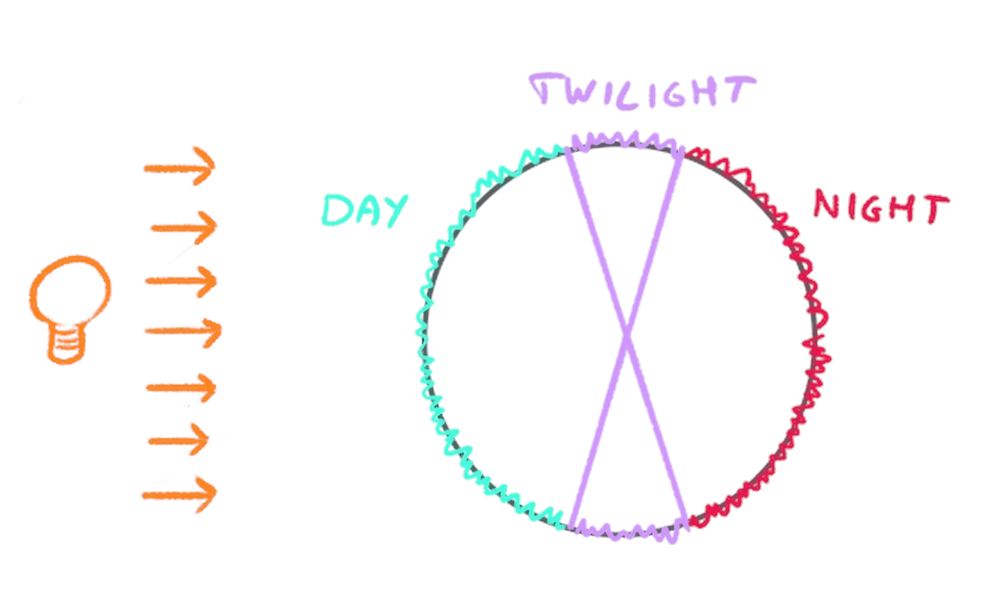
它在白天一侧看起来偏蓝,在夜晚一侧看不见,而在晨昏线(白天一侧与夜晚一侧相接之处)处看起来偏红。
渐变
首先,我们想要一个从白天一侧偏蓝到晨昏线偏红的渐变。
我们将使用 uniform 和 tweak 来找到完美的颜色,并乐在其中。
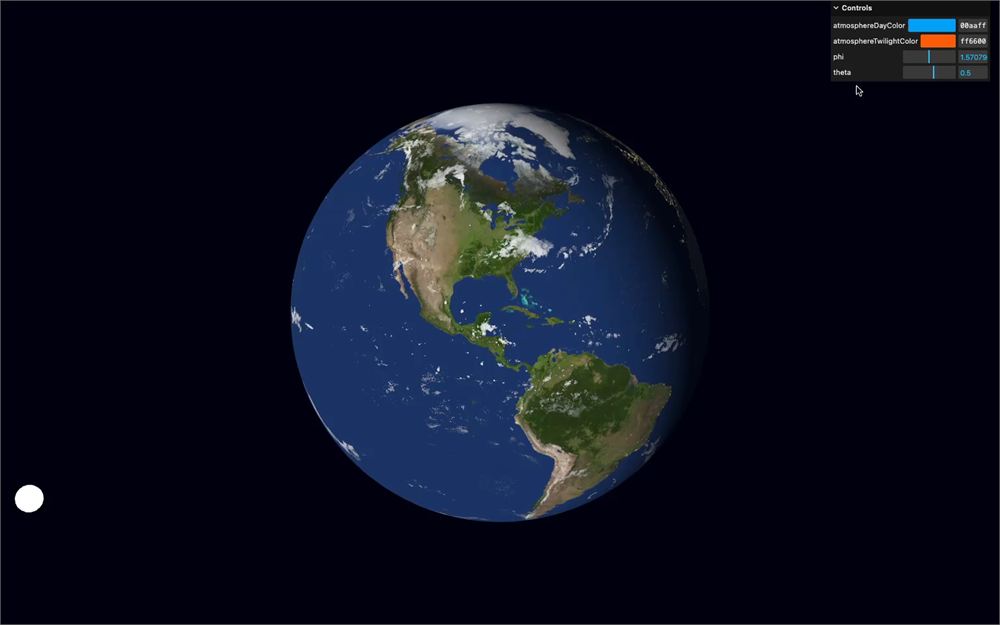
在 script.js 中,在 Earth 部分的开始处,创建一个 earthParameters 对象,并把 atmosphereDayColor 属性设为 '#00aaff',把 atmosphereTwilightColor 属性设为 '#ff6600':
/**
 * Earth
 */
const earthParameters = {}
earthParameters.atmosphereDayColor = '#00aaff'
earthParameters.atmosphereTwilightColor = '#ff6600'
使用 Uniform 和 Color 类创建相应的 uniform,分别命名为 uAtmosphereDayColor 和 uAtmosphereTwilightColor:
const earthMaterial = new THREE.ShaderMaterial({
    // ...
    uniforms:
    {
        // ...
        uAtmosphereDayColor: new THREE.Uniform(new THREE.Color(earthParameters.atmosphereDayColor)),
        uAtmosphereTwilightColor: new THREE.Uniform(new THREE.Color(earthParameters.atmosphereTwilightColor))
    }
})
使用 gui 上的 addColor() 方法创建 tweak,并在 tweak 变化时更新相应的 uniform:
const earthParameters = {}
earthParameters.atmosphereDayColor = '#00aaff'
earthParameters.atmosphereTwilightColor = '#ff6600'

gui
    .addColor(earthParameters, 'atmosphereDayColor')
    .onChange(() =>
    {
        earthMaterial.uniforms.uAtmosphereDayColor.value.set(earthParameters.atmosphereDayColor)
    })

gui
    .addColor(earthParameters, 'atmosphereTwilightColor')
    .onChange(() =>
    {
        earthMaterial.uniforms.uAtmosphereTwilightColor.value.set(earthParameters.atmosphereTwilightColor)
    })
在 fragment.glsl 中,把这两个颜色 uniform 作为 vec3 取出:
uniform vec3 uAtmosphereDayColor;
uniform vec3 uAtmosphereTwilightColor;
现在我们需要根据朝向太阳的方向,在 uAtmosphereDayColor 和 uAtmosphereTwilightColor 之间混合,并且可以复用我们之前创建的 sunOrientation。
创建一个 float atmosphereDayMix 变量,并使用类似于我们对 dayMix 所做的 smoothstep 来重映射 sunOrientation:
void main()
{
    // ...

    // Atmosphere
    float atmosphereDayMix = smoothstep(- 0.5, 1.0, sunOrientation);

    // Final color
    // ...
}
根据 atmosphereDayMix 在 uAtmosphereTwilightColor 和 uAtmosphereDayColor 之间混合,并把结果保存到一个 vec3 atmosphereColor 变量中:
void main()
{
    // ...

    // Atmosphere
    float atmosphereDayMix = smoothstep(- 0.5, 1.0, sunOrientation);
    vec3 atmosphereColor = mix(uAtmosphereTwilightColor, uAtmosphereDayColor, atmosphereDayMix);

    // Final color
    // ...
}
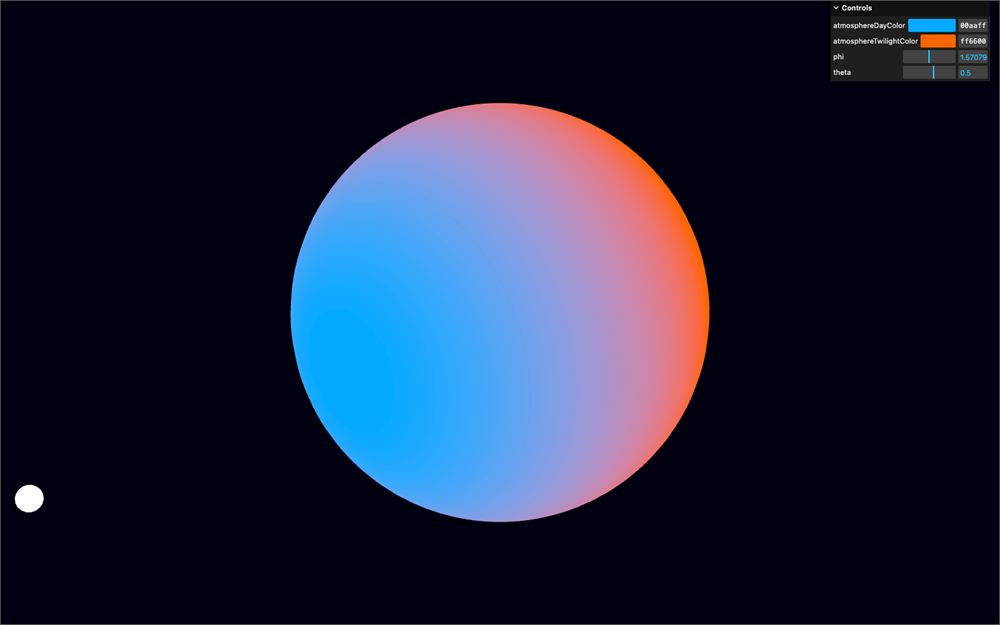
把它赋值给 color,看看会得到什么:
void main()
{
    // ...

    // Atmosphere
    float atmosphereDayMix = smoothstep(- 0.5, 1.0, sunOrientation);
    vec3 atmosphereColor = mix(uAtmosphereTwilightColor, uAtmosphereDayColor, atmosphereDayMix);
    color = atmosphereColor;

    // Final color
    // ...
}
Fresnel
大气层的渐变看起来还行,但我们需要把它与 color 混合,而不是像现在这样完全替换它。
正如我们之前所说,大气层在行星边缘更明显。我们需要常见的 fresnel。
在 Atmosphere 部分之前,像我们在之前课程中那样,使用 viewDirection 和 normal 的 dot 来计算 Fresnel:
void main()
{
    // ...

    // Fresnel
    float fresnel = dot(viewDirection, normal);

    // Atmosphere
    // ...
}
注释掉 Atmosphere 部分,并把 fresnel 作为 vec3 发送到 color,看看会得到什么:
void main()
{
    // ...

    // Fresnel
    float fresnel = dot(viewDirection, normal);
    color = vec3(fresnel);

    // // Atmosphere
    // float atmosphereDayMix = smoothstep(- 0.5, 1.0, sunOrientation);
    // vec3 atmosphereColor = mix(uAtmosphereTwilightColor, uAtmosphereDayColor, atmosphereDayMix);
    // color = atmosphereColor;

    // ...
}
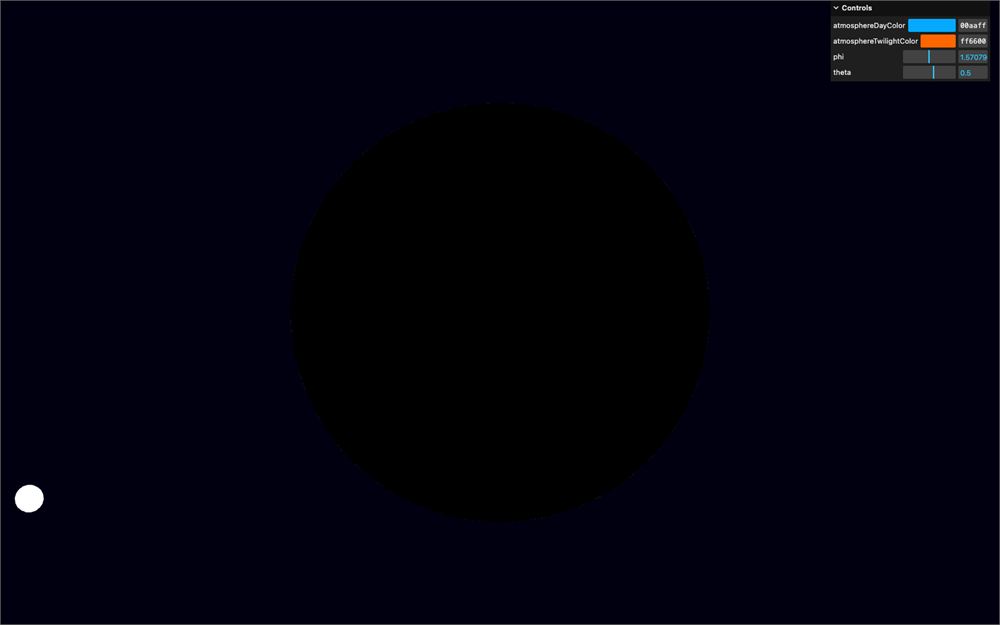
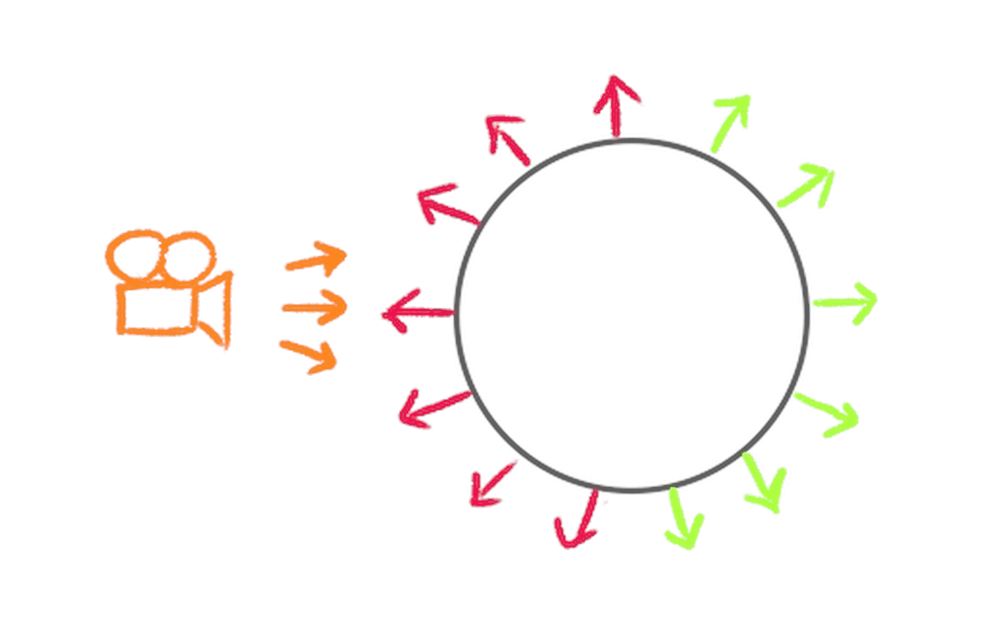
只有黑色。原因是 normal 的方向与视线方向相反,最终值的范围是 -1.0 到 0.0:
作为一个快速的修复,我们可以加上 1:
void main()
{
    // ...

    // Fresnel
    float fresnel = dot(viewDirection, normal) + 1.0;
    color = vec3(fresnel);

    // ...
}
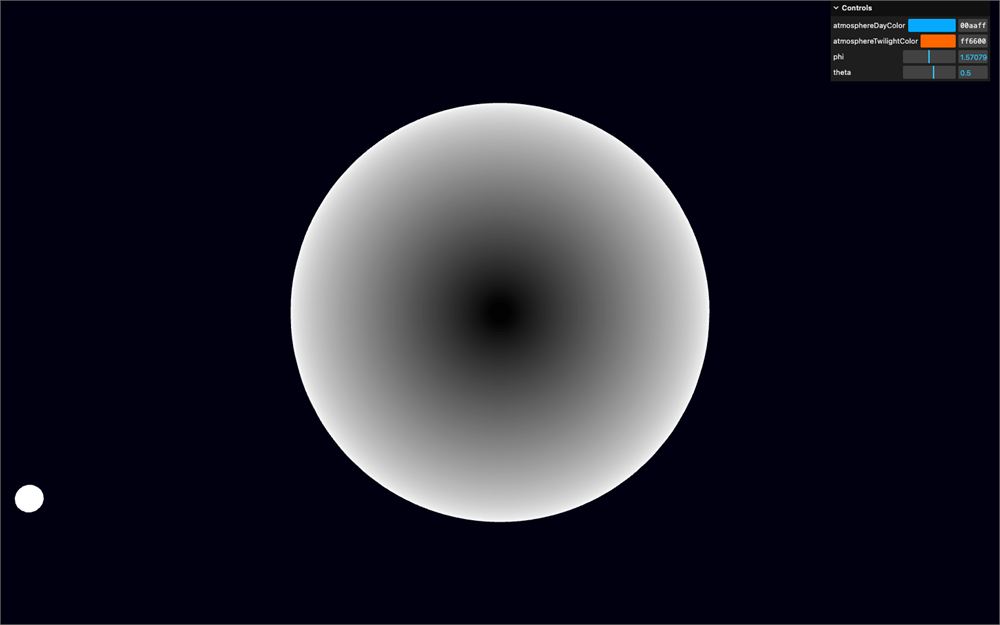
让我们对它使用 pow,把 fresnel 更多地推向边缘:
void main()
{
    // ...

    // Fresnel
    float fresnel = dot(viewDirection, normal) + 1.0;
    fresnel = pow(fresnel, 2.0);
    color = vec3(fresnel);

    // ...
}
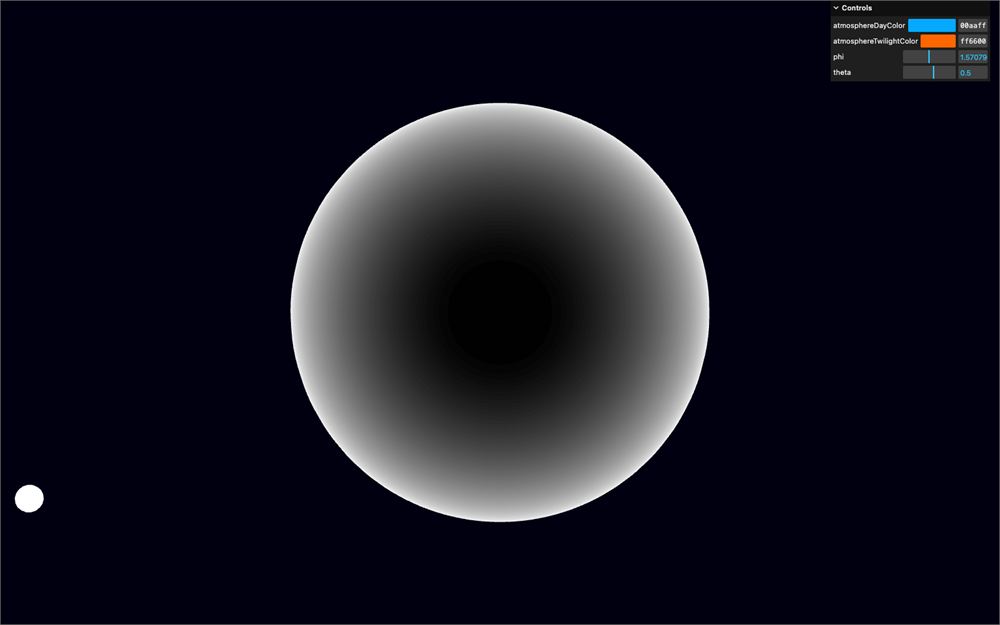
移除使用 fresnel 的 color 测试,并重新插入大气层部分:
void main()
{
    // ...

    // Fresnel
    float fresnel = dot(viewDirection, normal) + 1.0;
    fresnel = pow(fresnel, 2.0);

    // Atmosphere
    float atmosphereDayMix = smoothstep(- 0.5, 1.0, sunOrientation);
    vec3 atmosphereColor = mix(uAtmosphereTwilightColor, uAtmosphereDayColor, atmosphereDayMix);
    color = atmosphereColor;

    // ...
}
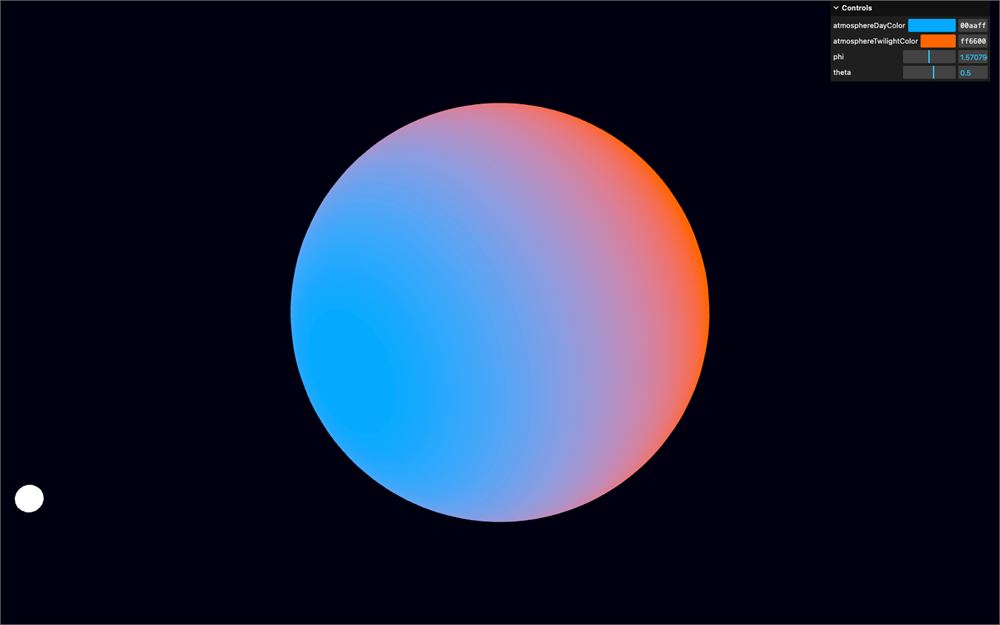
组合
我们有了颜色渐变,也有了 Fresnel。是时候把它们组合起来了,我们可以使用常见的 mix,根据 fresnel 在 color 和 atmosphereColor 之间混合:
void main()
{
    // ...

    // Atmosphere
    float atmosphereDayMix = smoothstep(- 0.5, 1.0, sunOrientation);
    vec3 atmosphereColor = mix(uAtmosphereTwilightColor, uAtmosphereDayColor, atmosphereDayMix);
    color = mix(color, atmosphereColor, fresnel);

    // ...
}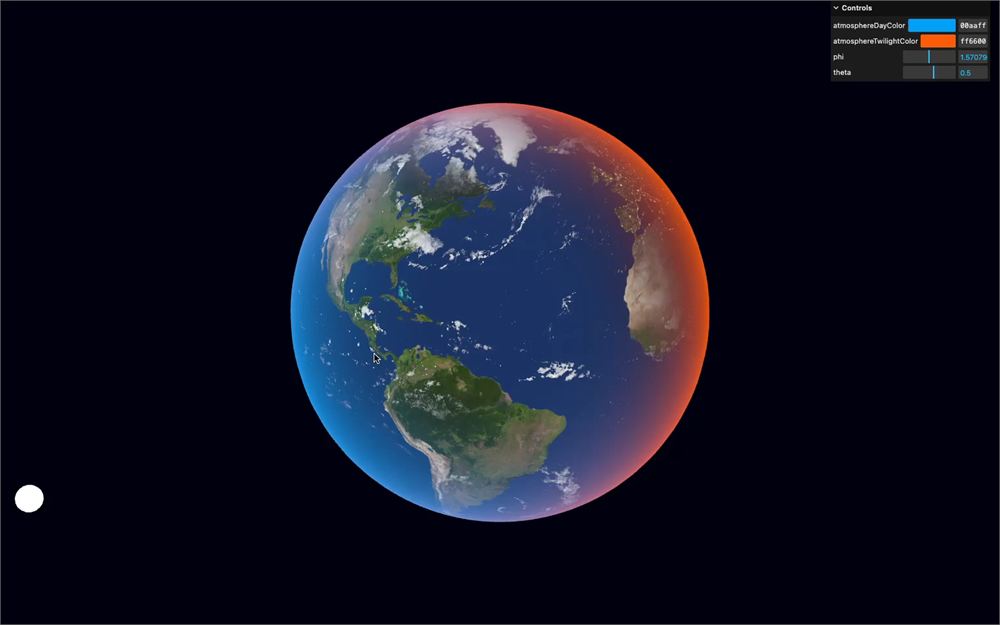
还不错,但大气层在地球的夜晚一侧太明显了。
幸运的是,我们已经有这样一个随过渡到夜晚而降低的变量,那就是 atmosphereDayMix。
在 mix 中把 fresnel 乘以 atmosphereDayMix:
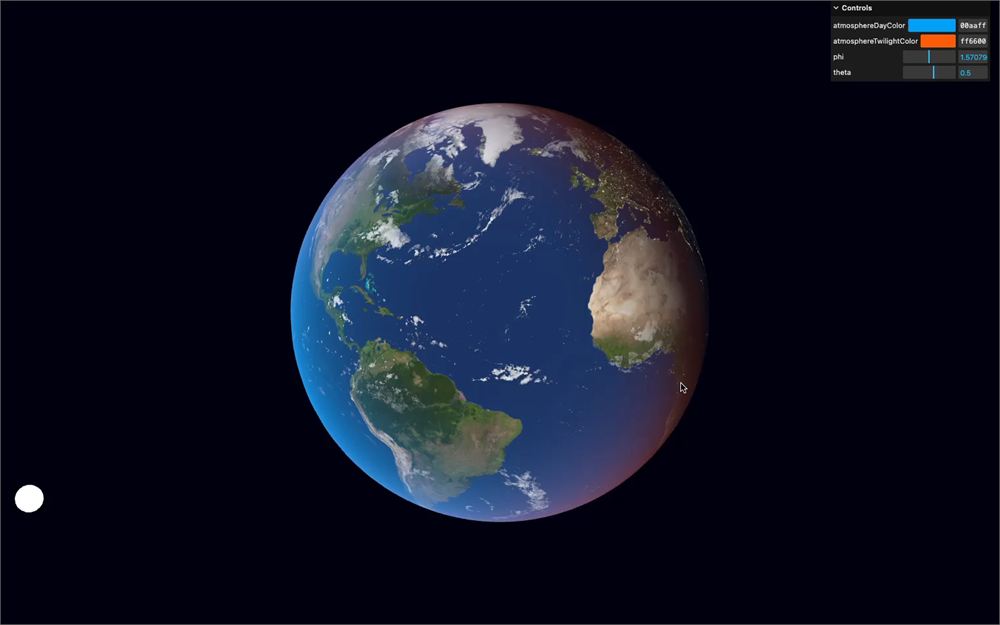
void main()
{
    // ...
    color = mix(color, atmosphereColor, fresnel * atmosphereDayMix);

    // ...
}
高光
我们的地球缺少了太阳的反射。
我们将完全照搬我们为 directional light 自定义着色所做的内容。稍后,我们将使用 uSpecularCloudsTexture,让只有水域具有反射。
由于这正是在之前某一课中做过的内容,我们将会比较快速地过一遍。
首先,我们需要太阳的反射向量:
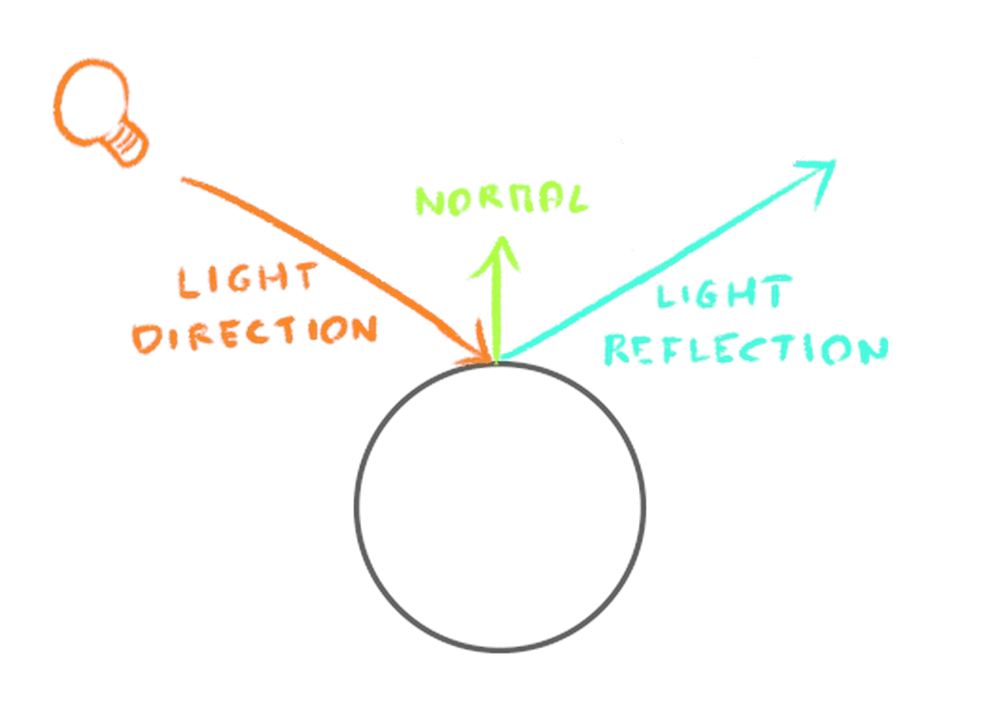
我们可以根据 normal,对 uSunDirection 使用 reflect 函数来计算它,但要注意,我们需要的是从太阳指向地球的向量,也就是说我们需要对 uSunDirection 取负:
void main()
{
    // ...

    // Specular
    vec3 reflection = reflect(- uSunDirection, normal);

    // Final color
    // ...
}
如果 reflection 和 viewDirection 对齐,我们希望得到一个较高的值。否则,我们希望这个值减小。我们可以使用 dot 来实现:
void main()
{
    // ...

    // Specular
    vec3 reflection = reflect(- uSunDirection, normal);
    float specular = dot(reflection, viewDirection);

    // ...
}
让我们把它作为 vec3() 发送到 color,测试一下会得到什么:
void main()
{
    // ...

    // Specular
    vec3 reflection = reflect(- uSunDirection, normal);
    float specular = dot(reflection, viewDirection);
    color = vec3(specular);

    // ...
}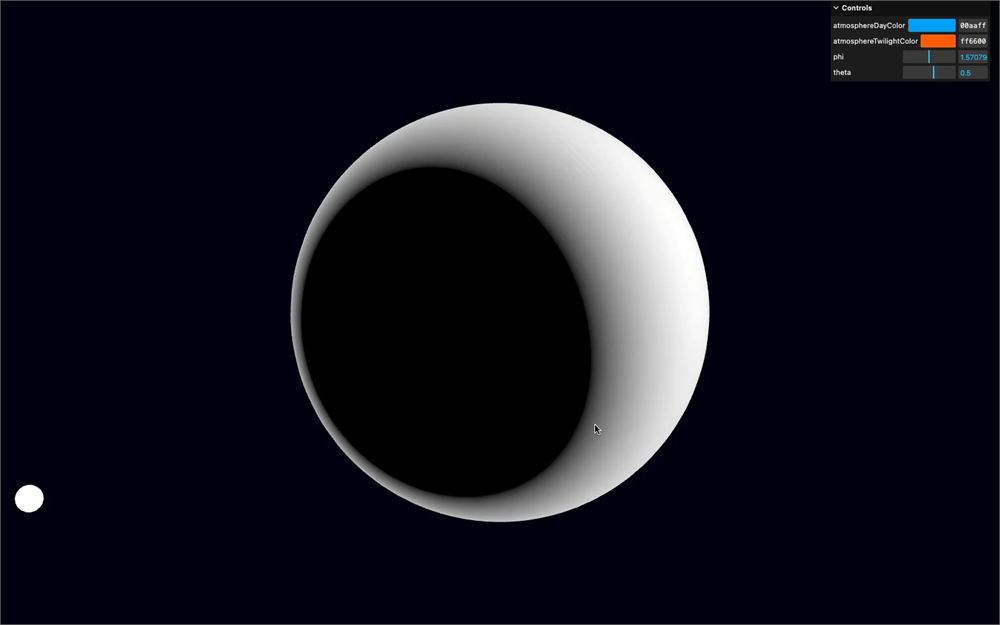
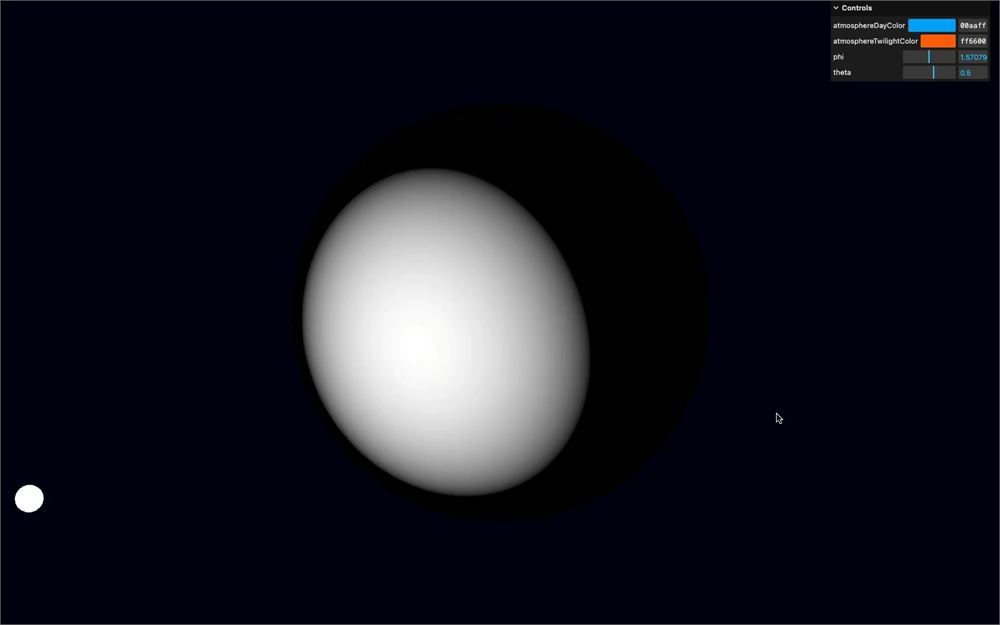
我们犯了一个经典错误,我们需要的是相反的值。为此,我们只需对 dot 取负(negate):
void main()
{
    // ...

    // Specular
    vec3 reflection = reflect(- uSunDirection, normal);
    float specular = - dot(reflection, viewDirection);
    color = vec3(specular);

    // ...
}
使用 max 对它进行钳制:
void main()
{
    // ...

    // Specular
    vec3 reflection = reflect(- uSunDirection, normal);
    float specular = - dot(reflection, viewDirection);
    specular = max(specular, 0.0);
    color = vec3(specular);

    // ...
}
再用 pow 将其收缩:
void main()
{
    // ...

    // Specular
    vec3 reflection = reflect(- uSunDirection, normal);
    float specular = - dot(reflection, viewDirection);
    specular = max(specular, 0.0);
    specular = pow(specular, 32.0);
    color = vec3(specular);

    // ...
}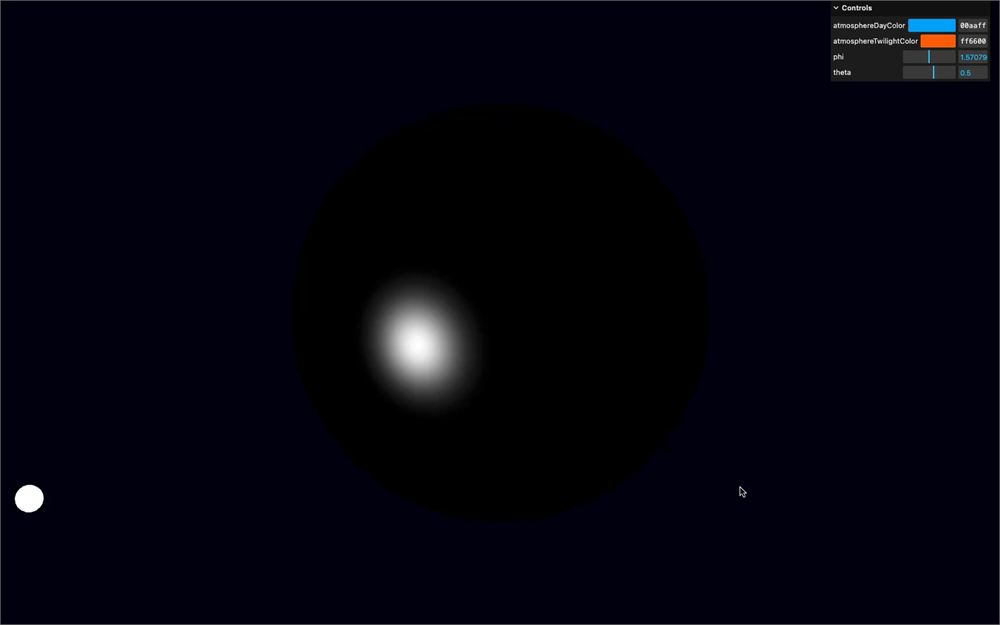
这是一个不错的高光。
不要替换 color,而是往其中累加:
void main()
{
    // ...

    // Specular
    vec3 reflection = reflect(- uSunDirection, normal);
    float specular = - dot(reflection, viewDirection);
    specular = max(specular, 0.0);
    specular = pow(specular, 32.0);
    color += specular;

    // ...
}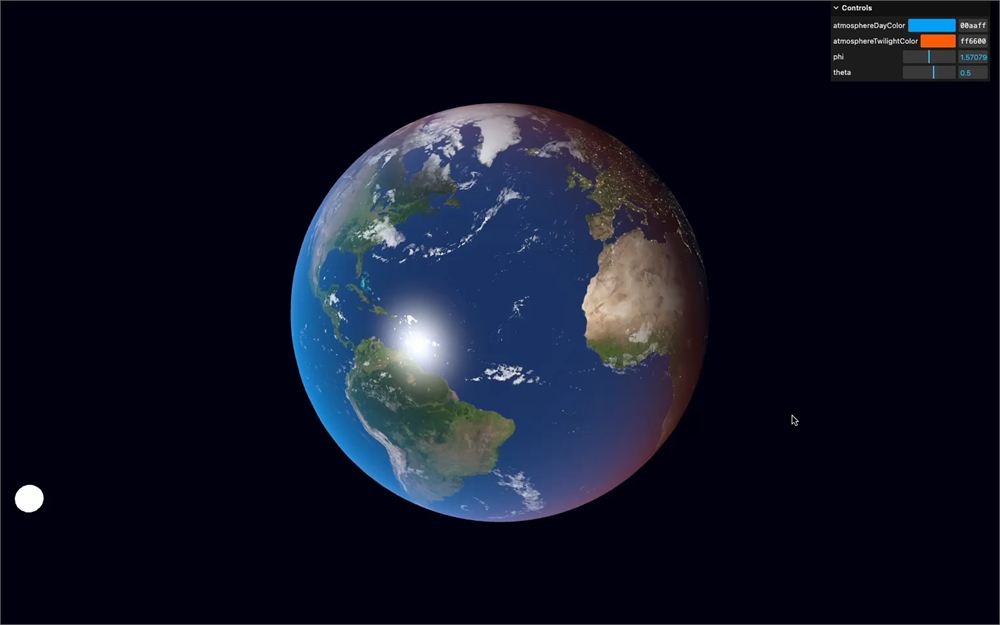
它几乎完美了,但白色反射太强,导致我们从背后观察时无法欣赏温暖的晨昏线:
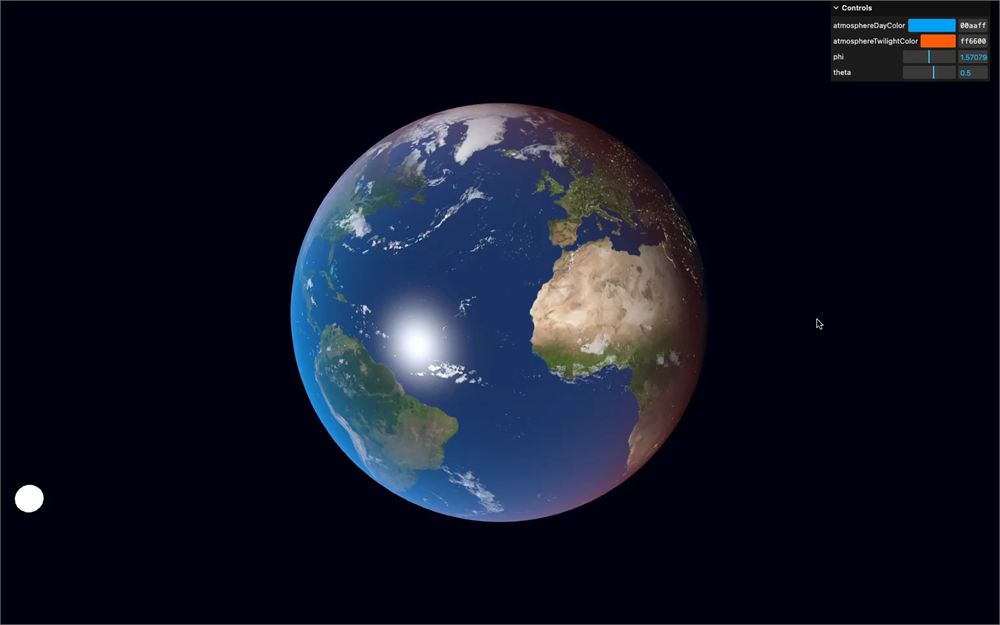
我们希望 specular 具有 atmosphereColor 的颜色,但仅当该 specular 位于边缘时。你猜对了,我们需要 fresnel。
创建一个 vec3 specularColor,并给它赋值 vec3(1.0)(白色)和 atmosphereColor 根据 fresnel 的混合结果。如果你想看看它是什么样子,就把它赋值给 color:
void main()
{
    // ...

    // Specular
    // ...

    vec3 specularColor = mix(vec3(1.0), atmosphereColor, fresnel);
    color = specularColor;

    // ...
}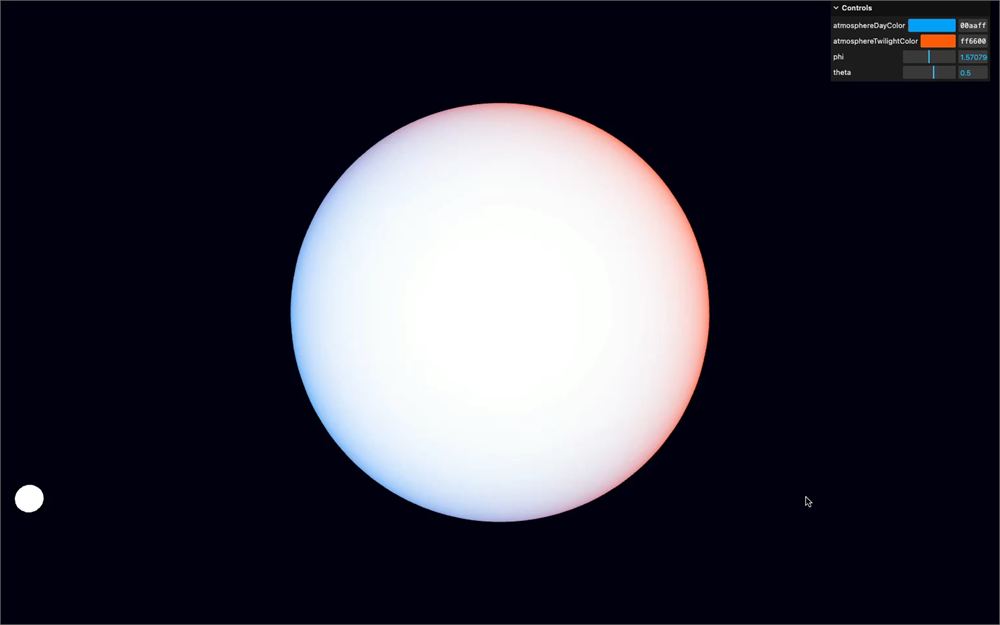
在边缘处,我们得到大气层的颜色,在中心处我们得到白色。
把 specular 放回到 color 上,但将它乘以 specularColor:
void main()
{
    // ...

    vec3 specularColor = mix(vec3(1.0), atmosphereColor, fresnel);
    color += specular * specularColor;

    // Final color
    // ...
}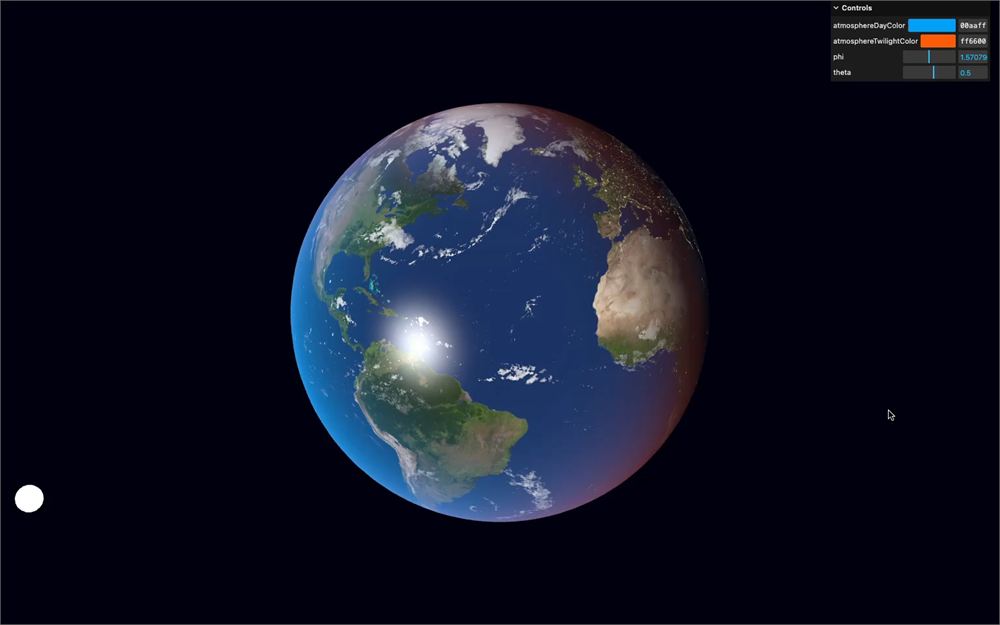
现在从背后观察时,高光会像大气层一样温暖。
我们快完成了。现在只需把高光乘以 specular map,它位于 specularCloudColor 的 r 通道中:
void main()
{
    // ...

    // Specular
    // ...
    specular *= specularCloudColor.r;

    vec3 specularColor = mix(vec3(1.0), atmosphereColor, fresnel);
    color += specular * specularColor;

    // ...
}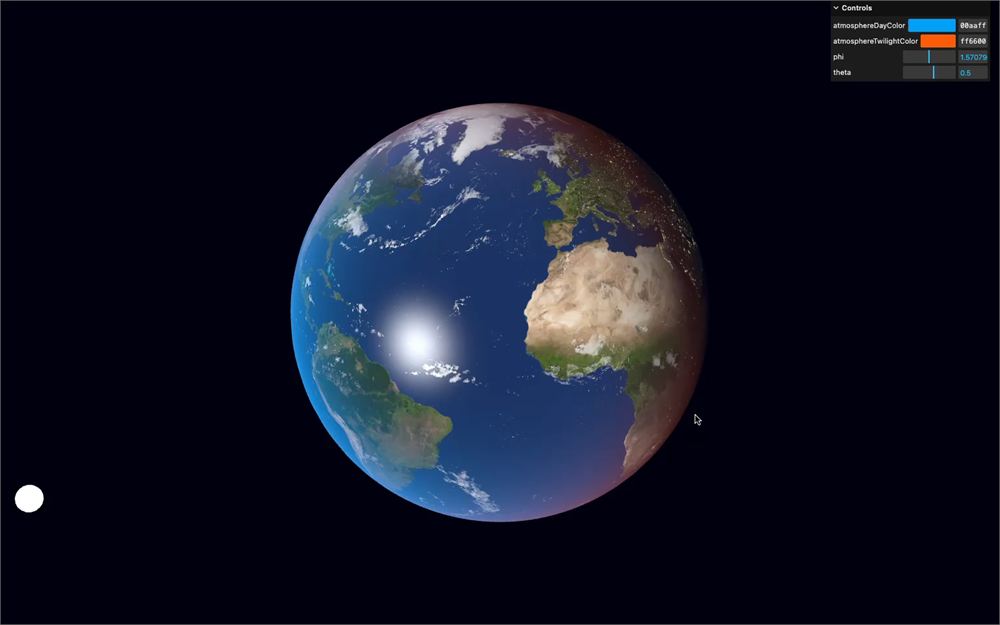
现在只有水域在反射太阳。
我们可以让大陆也有轻微的反射,但目前这样的对比看起来也不错。
大气层
地球本身我们已经完成了,但我们还缺少一个关键元素,它会大大提升地球的视觉效果,那就是真正的大气层。
我说的不是我们在地球上已经有的大气层颜色。我说的是环绕地球的体积感大气层。
理论
我们将通过创建一个稍大的球体来伪造这种大气层,只显示该球体的背面,并使用经典的 Fresnel 让它在边缘处淡出:
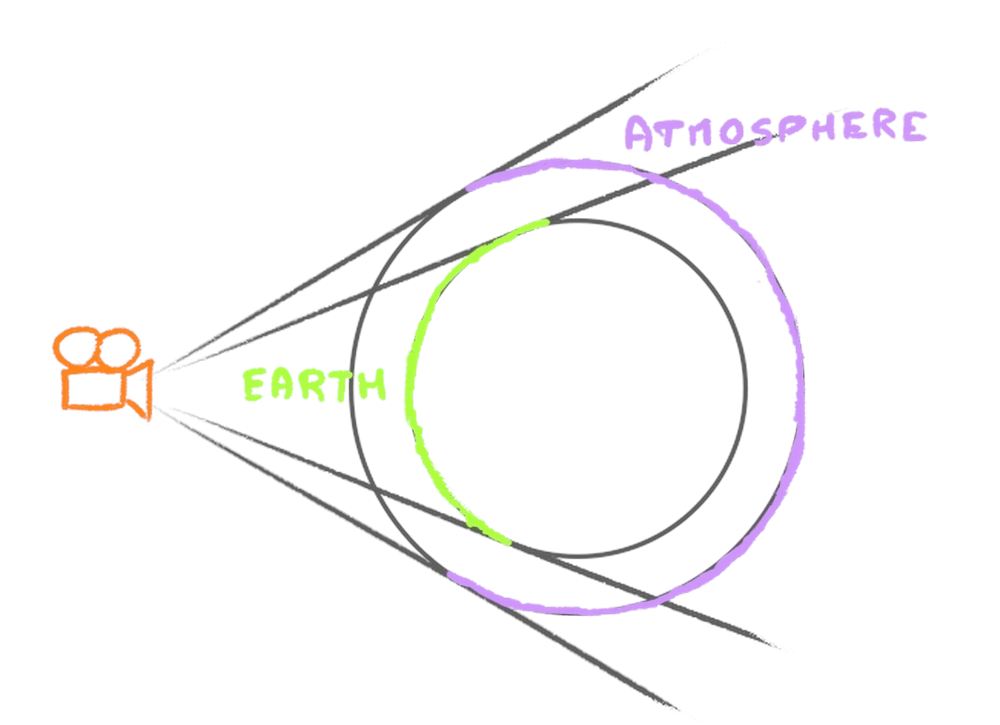
由于大气层的颜色与我们在地球上设置的颜色相同,我们将能够复用我们为地球 shader 所写的内容。
基础
让我们先创建大气层的球体。
我们可以复用 earthGeometry,但我们需要一个不同的 material。
使用 ShaderMaterial 创建一个 atmosphereMaterial,目前不带任何属性:
// Atmosphere
const atmosphereMaterial = new THREE.ShaderMaterial()
使用 earthGeometry 和 atmosphereMaterial 创建 atmosphere mesh:
const atmosphere = new THREE.Mesh(earthGeometry, atmosphereMaterial)
scene.add(atmosphere)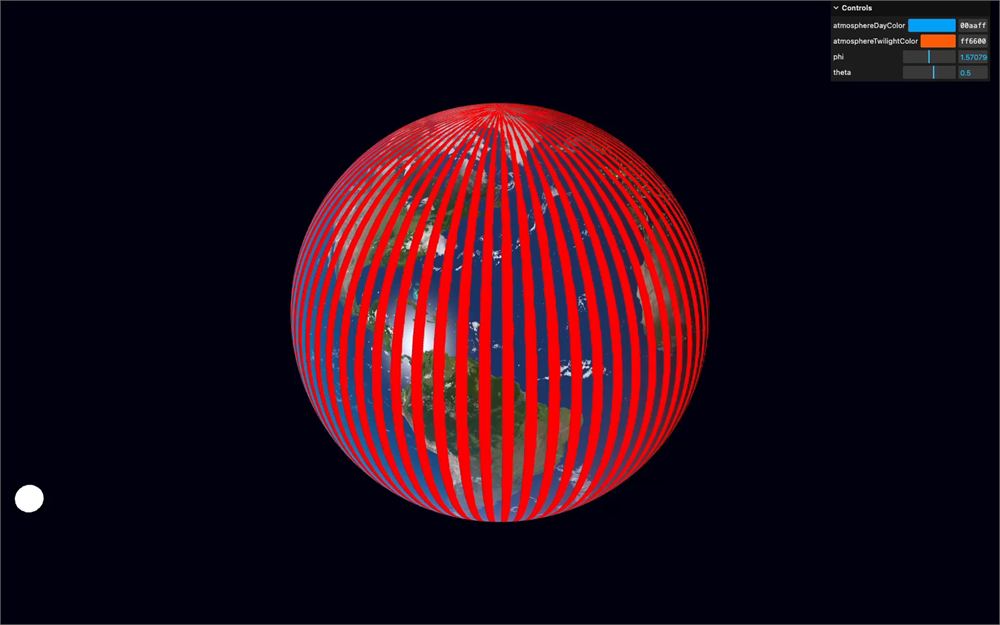
我们遇到了一些 z-fighting,因为两个球体处在同一位置;它们闪烁是因为地球在旋转而 atmosphere 不旋转,这不是问题。毕竟,我们将把 atmosphere 放大 0.04:
// Atmosphere
const atmosphereMaterial = new THREE.ShaderMaterial()

const atmosphere = new THREE.Mesh(earthGeometry, atmosphereMaterial)
atmosphere.scale.set(1.04, 1.04, 1.04)
scene.add(atmosphere)
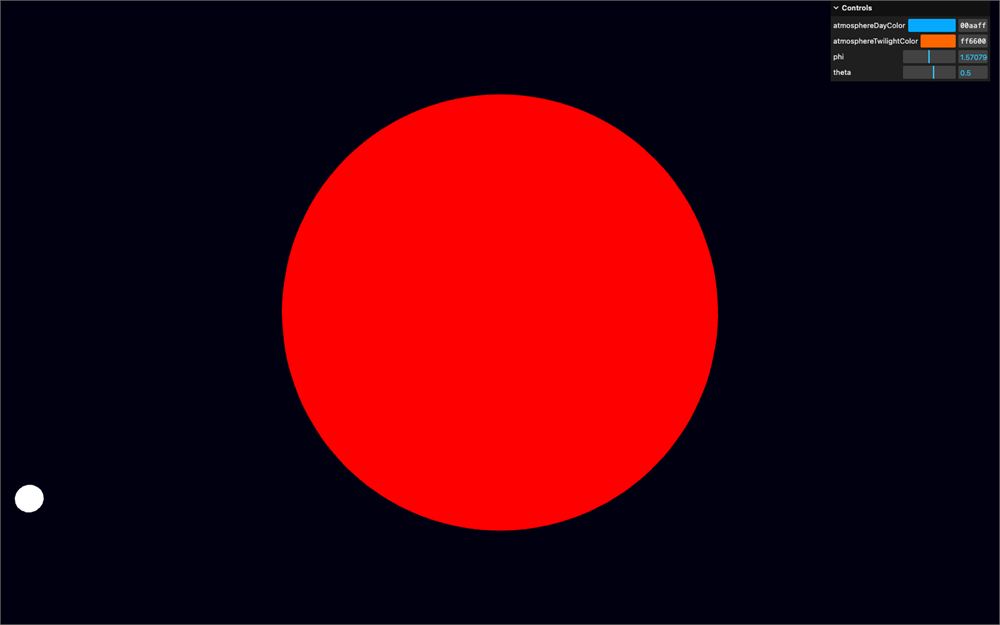
1.015 会更真实、更准确,但太薄了,难以察觉。
现在我们把 side 设为 THREE.BackSide,以便只看到背面;顺便把 transparent 设为 true,因为我们已经知道会用到 alpha:
const atmosphereMaterial = new THREE.ShaderMaterial({
    side: THREE.BackSide,
    transparent: true
})
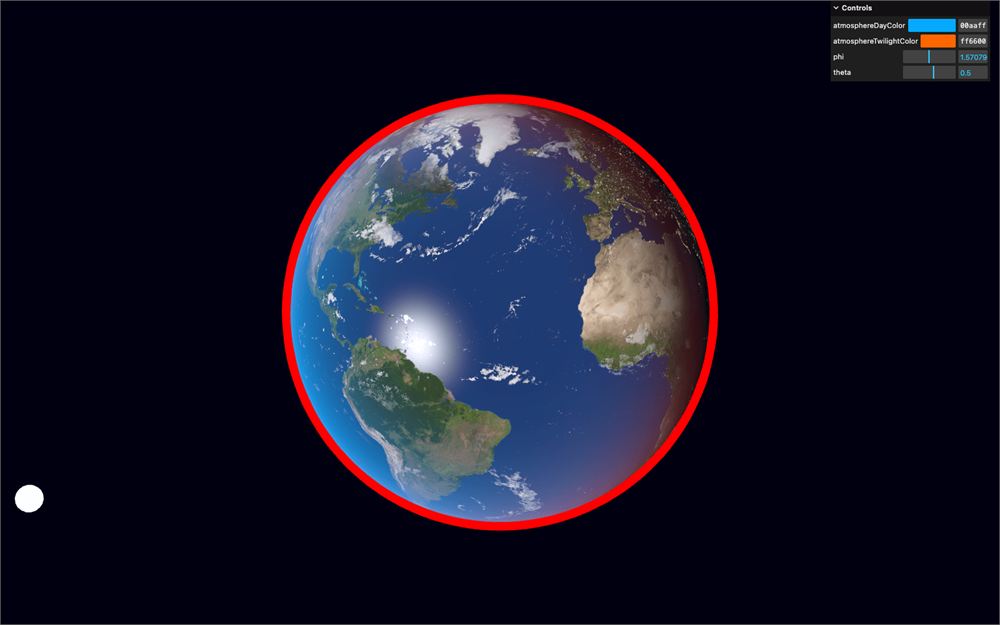
Shader
如前所述,这个 shader 将与地球 shader 相似,因此我们首先复制整个 src/shaders/earth/ 文件夹,并将其命名为 atmosphere/。
让我们浏览一下大气层的 vertex shader 和 fragment shader,决定保留什么、舍弃什么。
在 src/shaders/atmosphere/vertex.glsl 中:
- 移除
vUvvarying - 保留其余部分
varying vec3 vNormal;
varying vec3 vPosition;

void main()
{
    // Position
    vec4 modelPosition = modelMatrix * vec4(position, 1.0);
    gl_Position = projectionMatrix * viewMatrix * modelPosition;

    // Model normal
    vec3 modelNormal = (modelMatrix * vec4(normal, 0.0)).xyz;

    // Varyings
    vNormal = modelNormal;
    vPosition = modelPosition.xyz;
}
在 src/shaders/atmosphere/fragment.glsl 中:
- 移除与 texture 相关的 uniform
- 移除
vUvvarying - 保留
viewDirection、normal和color - 保留
sunOrientation - 移除
Day / night部分 - 移除
Specular clouds部分 - 移除
Clouds部分 - 移除
fresnel部分(我们稍后会从头开始做) - 保留
Atmosphere部分 - 只从
Atmosphere中移除fresnel乘法 - 移除
Specular部分
uniform vec3 uSunDirection;
uniform vec3 uAtmosphereDayColor;
uniform vec3 uAtmosphereTwilightColor;

varying vec3 vNormal;
varying vec3 vPosition;

void main()
{
    vec3 viewDirection = normalize(vPosition - cameraPosition);
    vec3 normal = normalize(vNormal);
    vec3 color = vec3(0.0);

    // Sun orientation
    float sunOrientation = dot(uSunDirection, normal);

    // Atmosphere
    float atmosphereDayMix = smoothstep(- 0.5, 1.0, sunOrientation);
    vec3 atmosphereColor = mix(uAtmosphereTwilightColor, uAtmosphereDayColor, atmosphereDayMix);
    color = mix(color, atmosphereColor, atmosphereDayMix);

    // Final color
    gl_FragColor = vec4(color, 1.0);
    #include <tonemapping_fragment>
    #include <colorspace_fragment>
}
这就是为什么组织良好、模块化的代码总是有益的。
将这两个 shader 分别作为 atmosphereVertexShader 和 atmosphereFragmentShader 导入:
import atmosphereVertexShader from './shaders/atmosphere/vertex.glsl'
import atmosphereFragmentShader from './shaders/atmosphere/fragment.glsl'
把它们添加到 atmosphereMaterial 的 vertexShader 和 fragmentShader 中,并从 earthMaterial 复制 uSunDirection、uAtmosphereDayColor 和 uAtmosphereTwilightColor uniform:
const atmosphereMaterial = new THREE.ShaderMaterial({
    vertexShader: atmosphereVertexShader,
    fragmentShader: atmosphereFragmentShader,
    uniforms:
    {
        uSunDirection: new THREE.Uniform(new THREE.Vector3(0, 0, 1)),
        uAtmosphereDayColor: new THREE.Uniform(new THREE.Color(earthParameters.atmosphereDayColor)),
        uAtmosphereTwilightColor: new THREE.Uniform(new THREE.Color(earthParameters.atmosphereTwilightColor))
    },
    // ...
})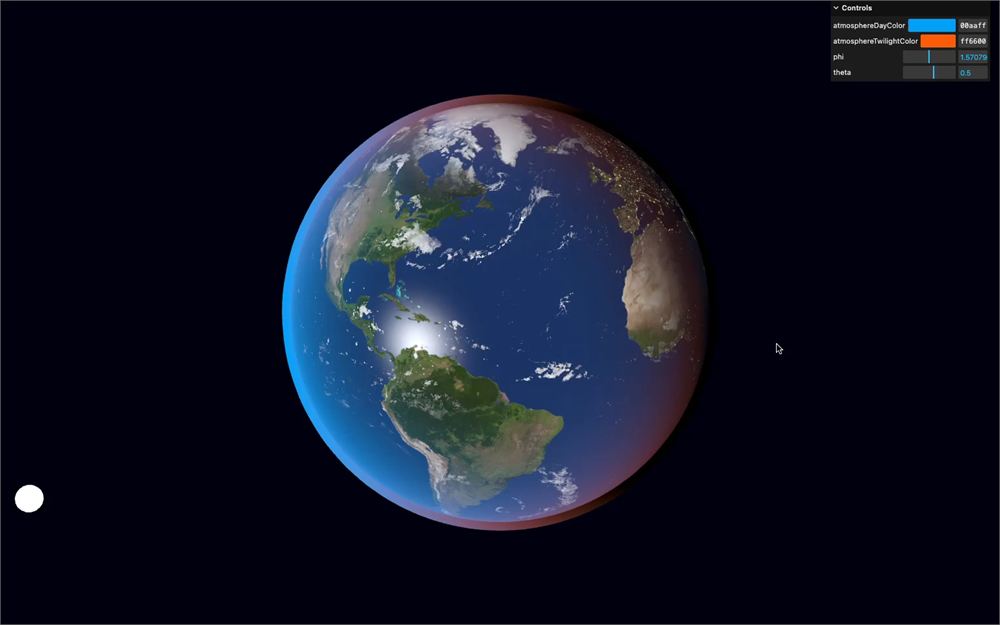
我们得到了一些效果,但还没完成。
在颜色 tweak 中,更新 atmosphereMaterial 的 uniform:
gui
    .addColor(earthParameters, 'atmosphereDayColor')
    .onChange(() =>
    {
        earthMaterial.uniforms.uAtmosphereDayColor.value.set(earthParameters.atmosphereDayColor)
        atmosphereMaterial.uniforms.uAtmosphereDayColor.value.set(earthParameters.atmosphereDayColor)
    })

gui
    .addColor(earthParameters, 'atmosphereTwilightColor')
    .onChange(() =>
    {
        earthMaterial.uniforms.uAtmosphereTwilightColor.value.set(earthParameters.atmosphereTwilightColor)
        atmosphereMaterial.uniforms.uAtmosphereTwilightColor.value.set(earthParameters.atmosphereTwilightColor)
    })
在 updateSun 函数中,更新 atmosphereMaterial 的 uniform:
const updateSun = () =>
{
    // Sun direction
    sunDirection.setFromSpherical(sunSpherical)

    // Debug
    debugSun.position
        .copy(sunDirection)
        .multiplyScalar(5)

    // Uniforms
    earthMaterial.uniforms.uSunDirection.value.copy(sunDirection)
    atmosphereMaterial.uniforms.uSunDirection.value.copy(sunDirection)
}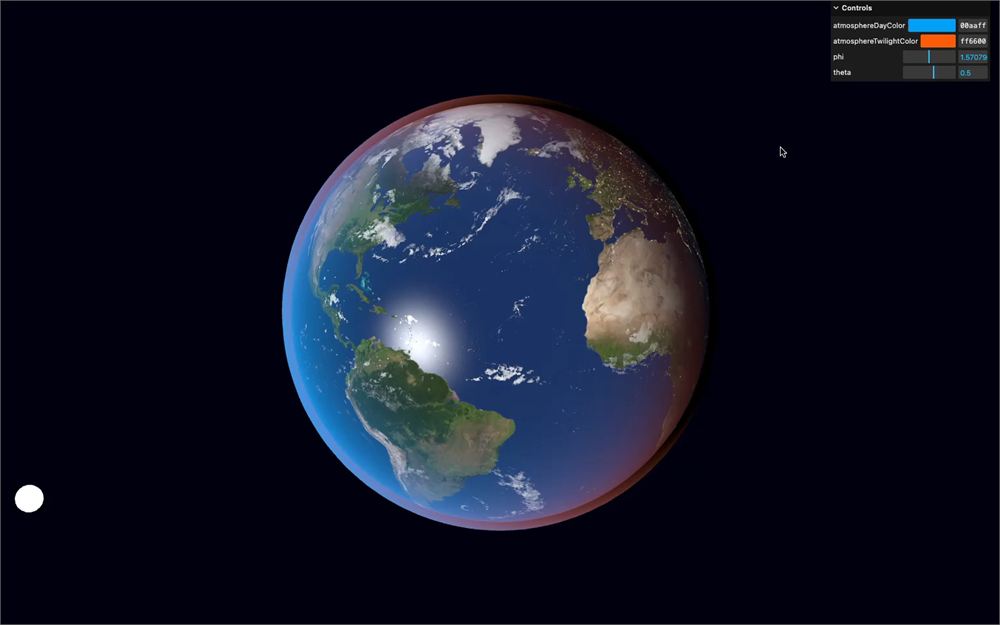
你其实看不太出来,但夜晚区域并不透明,它是黑色的。
为了更清楚地看到这个问题,在 script.js 中,把 setClearColor() 改成一个更亮的颜色:
renderer.setClearColor('#333333')
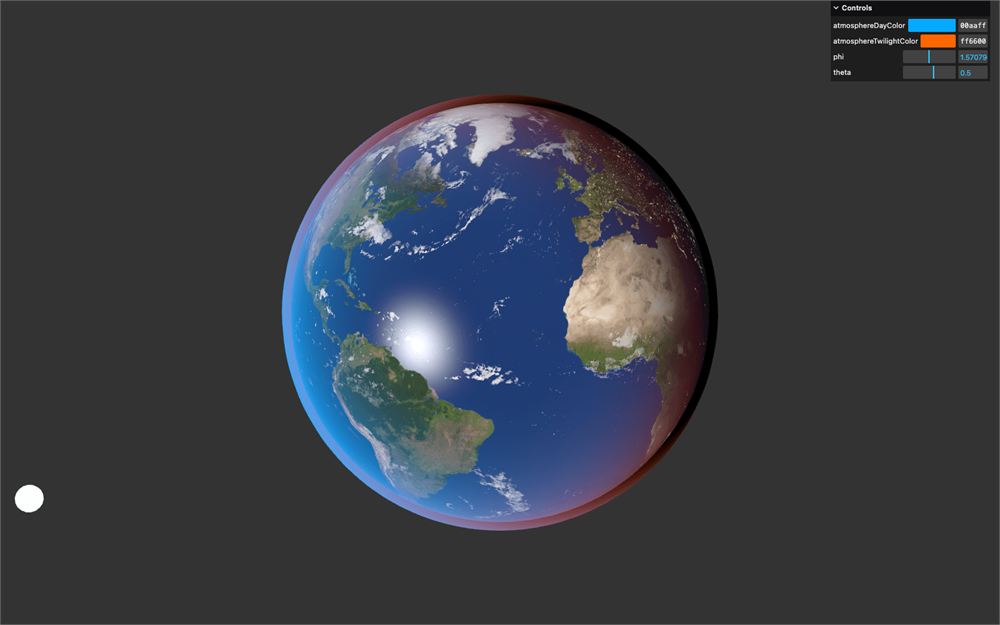
这个区域是黑色的,因为我们将 atmosphereColor 与基础 color 混合,但基础 color 是黑色的。
目前,我们直接把 atmosphereColor 加到 color 上,不使用 mix:
void main()
{
    // ...

    // Atmosphere
    // ...
    color += atmosphereColor;

    // ...
}
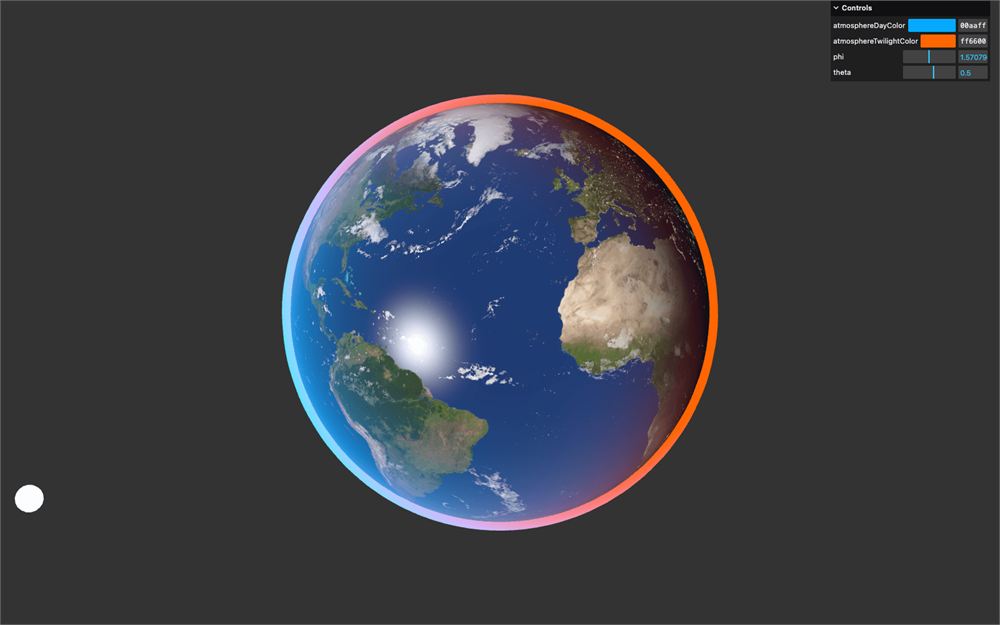
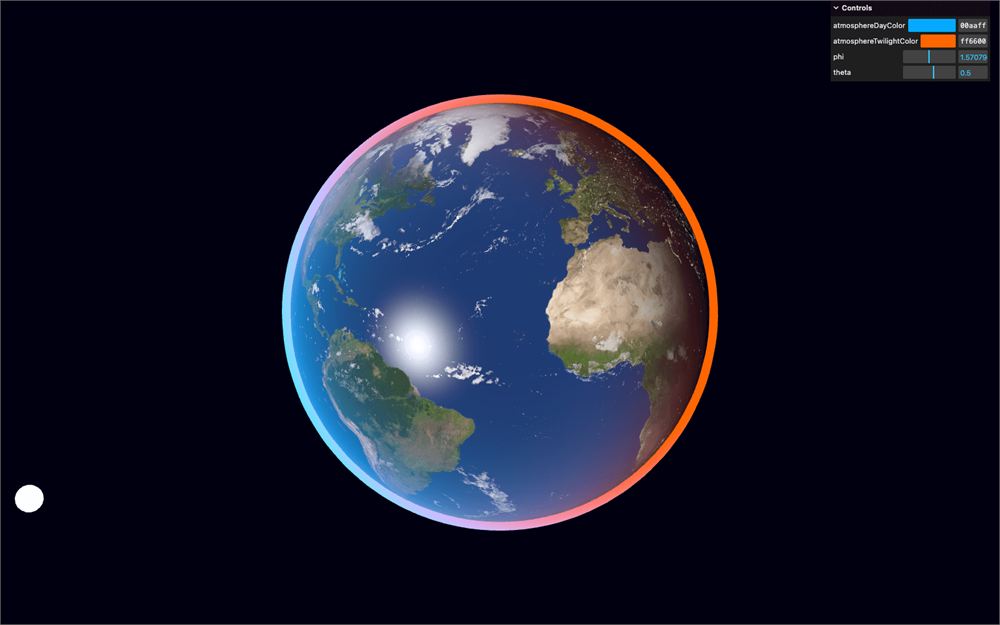
然后把 setClearColor() 改回 '#000011':
renderer.setClearColor('#000011')
Alpha
我们需要让 alpha 在球体的最边缘以及夜晚一侧都快速降低。
边缘 alpha
alpha 在接近边缘处应为 1.0,在正边缘处应为 0.0:
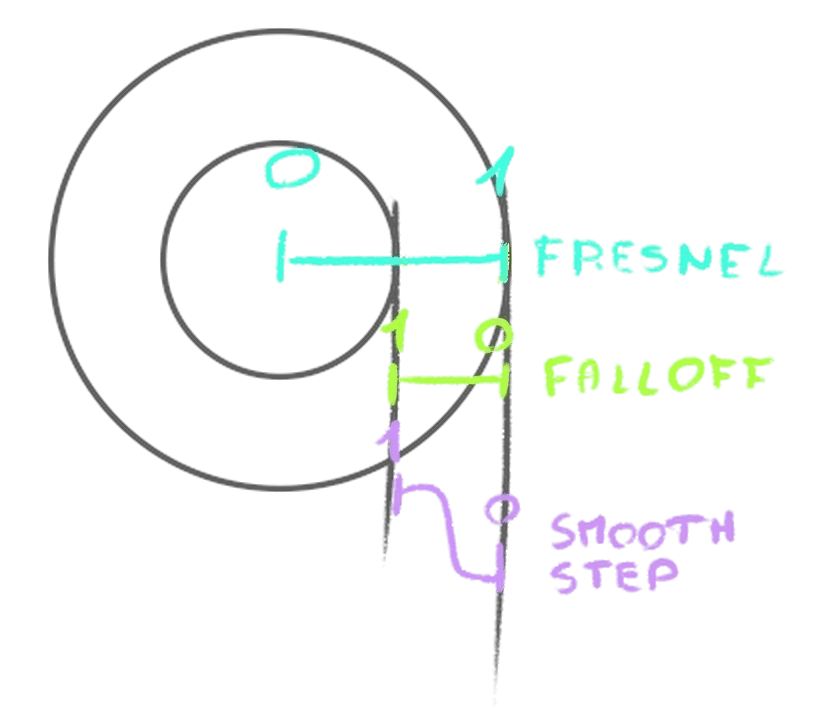
这正是我们在 Hologram 那一课所做的。
创建一个 float edgeAlpha 变量,并使用 Fresnel 的经典公式:
void main()
{
    // ...

    // Alpha
    float edgeAlpha = dot(viewDirection, normal);

    // Final color
    // ...
}
把它作为 vec3 发送到 color,看看会得到什么:
void main()
{
    // ...

    // Alpha
    float edgeAlpha = dot(viewDirection, normal);
    color = vec3(edgeAlpha);

    // ...
}
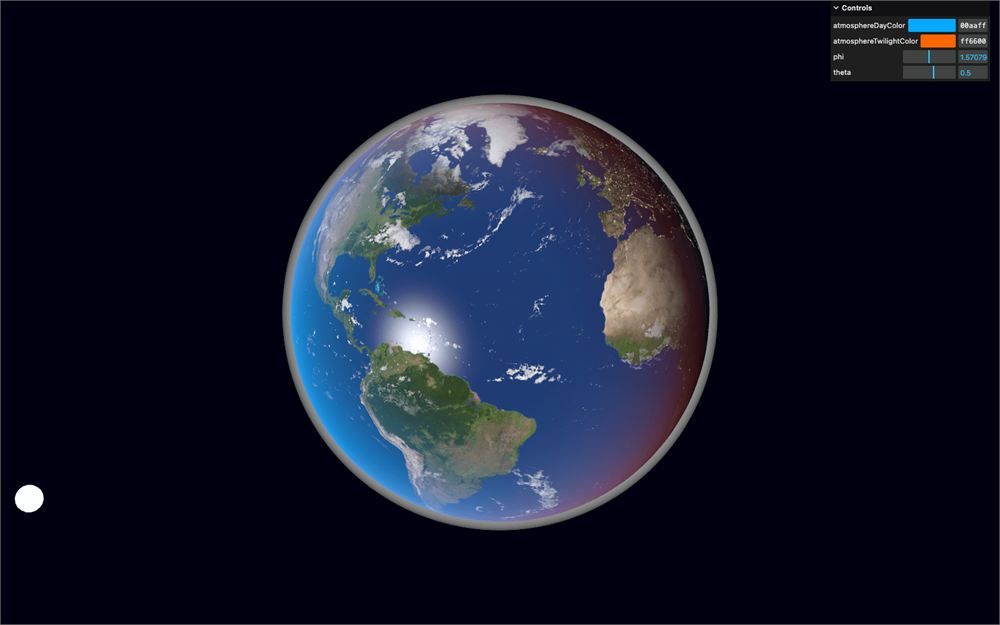
让我们使用 smoothstep 重映射该值,使渐变被推向边缘:
void main()
{
    // ...

    // Alpha
    float edgeAlpha = dot(viewDirection, normal);
    edgeAlpha = smoothstep(0.0, 0.5, edgeAlpha);
    color = vec3(edgeAlpha);

    // ...
}
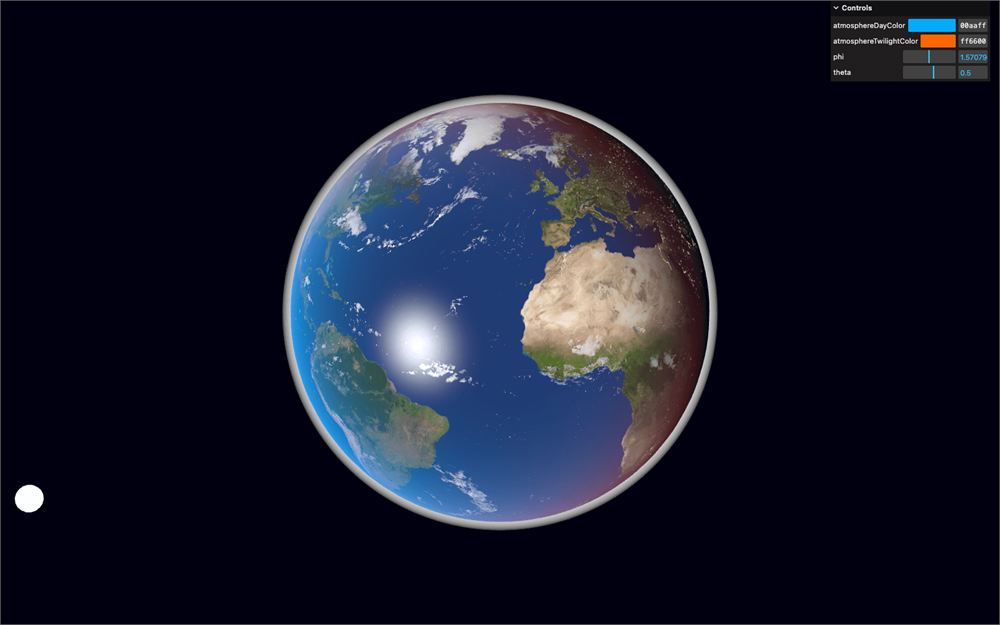
白天 alpha
我们的 edgeAlpha 已经就绪。现在我们想要一个在白天一侧高、在夜晚一侧低的 dayAlpha。
为此,我们可以使用 smootshtep 重映射 sunOrientation,并将其发送到 color,而不是 edgeAlpha:
void main()
{
    // ...

    // Alpha
    float edgeAlpha = dot(viewDirection, normal);
    edgeAlpha = smoothstep(0.0, 0.5, edgeAlpha);

    float dayAlpha = smoothstep(- 0.5, 0.0, sunOrientation);
    color = vec3(dayAlpha);

    // ...
}
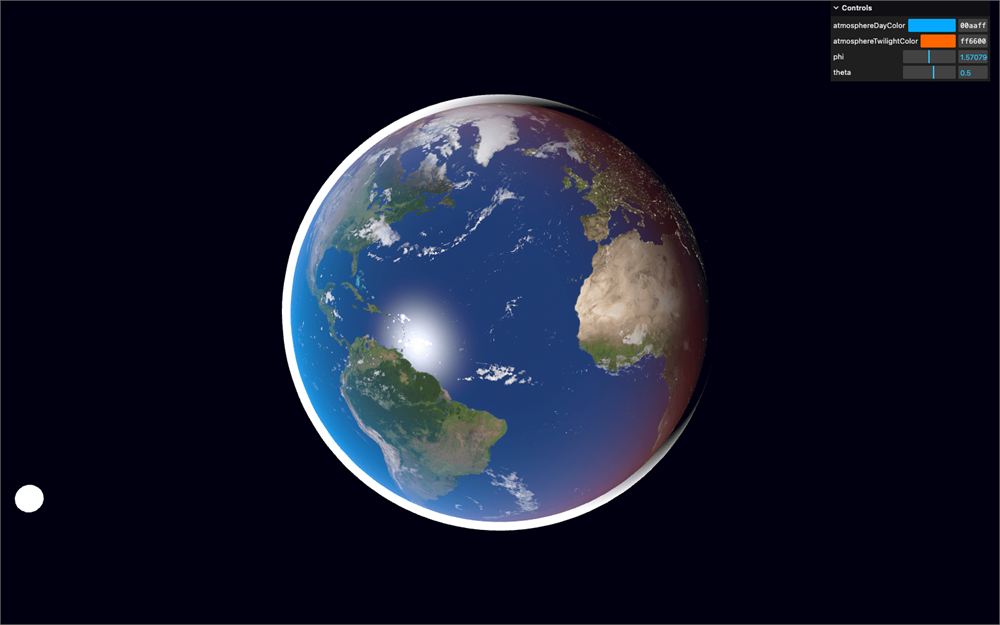
移除 color 测试:
void main()
{
    // ...

    // Alpha
    float edgeAlpha = dot(viewDirection, normal);
    edgeAlpha = smoothstep(0.0, 0.5, edgeAlpha);

    float dayAlpha = smoothstep(- 0.5, 0.0, sunOrientation);

    // ...
}
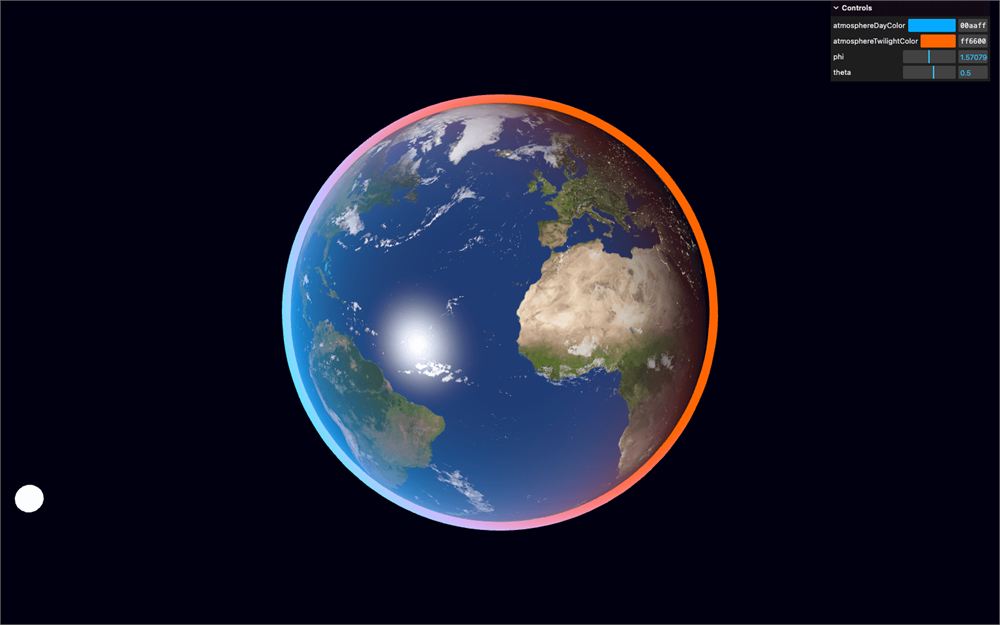
组合
我们有了两个 alpha。让我们把它们组合成一个 float alpha,并发送到 gl_FragColor 的 alpha 通道:
void main()
{
    // ...

    float alpha = edgeAlpha * dayAlpha;

    // Final color
    gl_FragColor = vec4(color, alpha);
    // ...
}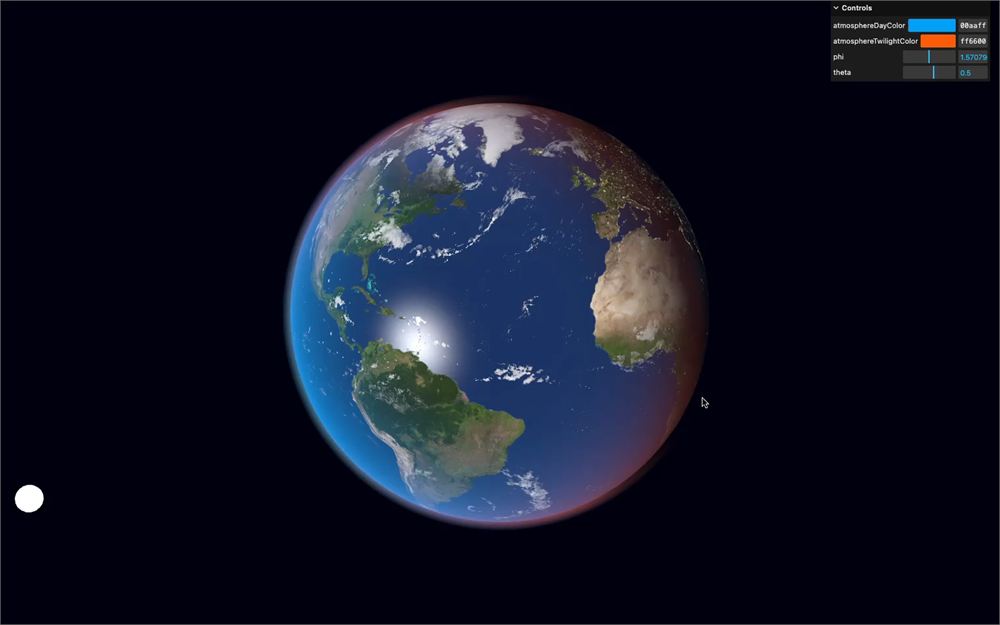
我们有了一个漂亮的大气层,它与地球完美融合,这意味着我们已经完成了这一课。
更进一步
一如既往,仍有改进的空间。
以下是一些建议: